Image encoding
Pixels and resolution
An digital image is broken up into tiny elements called pixels. (That word was actually coined as a contraction of “picture element.”) A pixel is perceived as a solid color, and neighboring pixels can be different colors.
When we refer to the resolution of an image or a display device, we might be talking about two different things:
The number of pixels in the image. For example, a typical low-resolution computer screen might by 1024×768. This is 786,432 pixels total, or about three-fourths of a megapixel. An high-definition (HD) video image is 1920×1080, or about 2 megapixels. Digital cameras can produce 5 or 10 megapixels or so, which means the image is larger than you can fit on most screens.
Resolution can also refer to the density of the pixels in the display – usually referred to as pixels per inch (PPI) or dots per inch (DPI). Computer screens tend to be around 100 ppi, but some are larger. The Apple Retina brand displays are in the range 220–320 ppi. We can achieve much higher density using print on paper: a high-end laser print might be 1200 dpi or even higher. Projection screens are likely very low density, just because the same number of pixels are stretched over several feet. I’d estimate that our projection screen in class is under 20 ppi (about 1024 pixels spread across 5 feet).
Black and white
So how do we encode pixels as bits? The easiest case is when the image is completely black and white. That is, each pixel is either on or off. Then we can represent each pixel as exactly one bit.
On paper or a whiteboard, it’s sensible to let 0=off=white (the default background color) and 1=on=black (the color of your pen). So let’s draw an 8×8 pixel grid. We’ll fill in some pixels and leave others blank. This particular grid displays an alien from the early arcade game Space Invaders.
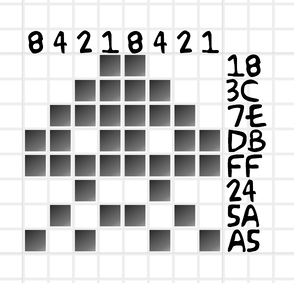
183C7EDBFF245AA5
Since each pixel is exactly one bit, it’s trivial to represent this as a binary number. The top row is 00011000, followed immediately by the next row 00111100 and so on. You’d have to know in advance that these bits represent an image that fits in an 8×8 grid. Otherwise, we could precede it by two bytes to specify the grid size.
Again, binary strings are long so it’s nice to be able to abbreviate it using hexadecimal. This leads to a very natural encoding where you write 8,2,4,1 over each group of 4 pixels, and then convert the results. You can see the hexadecimal encoding to the right of the image. In fact, Googling this hex string – 183C7EDBFF245AA5 – currently leads you to one page: my blog post on this topic!
You should practice encoding and decoding icons like this. Here’s one example you can decode from the hex.
Sample decode problem
My solution is available; it’s a character from an 8×8 bitmap font. To practice further, decode these additional characters from that font:
3C66703C0E663C007E607C0606663C00C6CCD8F0D8CCC60000663CFF3C6600000066ACD8366ACC00
You can also encode characters in hexadecimal based on this font image (zoom in with control-plus to see the 8×8 grids over each character).
You can also use the 1-bit per pixel encoding with color as long as each encoded image is one solid color. For example, in older versions of the Pac-Man game, the protagonist and each ghost are solid colors, even though the colors are all different. These shapes can still be encoded as 1 bit per pixel. (In class we’ll use my hexadecimal image workshop that adds color to the 1-bit per pixel encoding technique in a different way.)
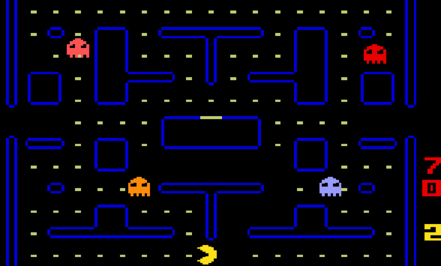
Pac-Man game – each moving character is one solid color
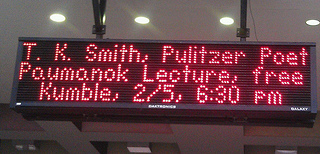
A 1-bit per pixel display on campus
Further exploration:
- This bitmap message was broadcast into space by the Arecibo radio telescope in Puerto Rico in 1974.
- Mario icon made from liquids in cups
- The Sketchbook of Susan Kare, the Artist Who Gave Computing a Human Face by Steve Silberman
Color images
How would we combine multiple colors into the same image? As a brief detour, let’s explore what we mean by color.
What is color?
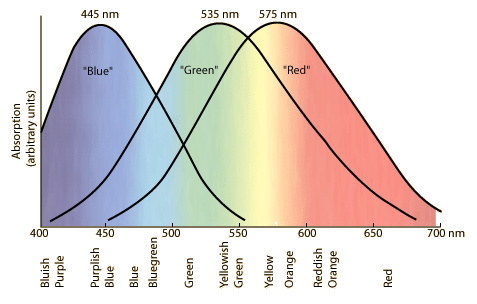
Color refers to the wavelength of light. We perceive short wavelengths as violet, and long wavelengths as red. In between are the usual spectrum of colors: orange, yellow, green, blue, etc. This range covers visible light, but there are also “colors” (other wavelengths) we can’t perceive at all. Light with longer wavelengths than red is infra-red, and with shorter wavelengths than violet is ultra-violet.

from How We See Color
Apart from the wavelength spectrum, the anatomy of our eyes leads to another way to explain color. Your retina contains light-sensitive cells known as rods and cones. The rods are largely color-blind, but are sensitive to small amounts of light so they help with night vision. The cones come in three flavors, sensitive to different wavelengths. The wavelengths that generate a response overlap, so the “in-between” colors are perceived as combinations of multiple cones.
When you painted in elementary school, you may have learned about the three primary colors: red, yellow, and blue. Red and yellow make orange, yellow and blue make green, etc.
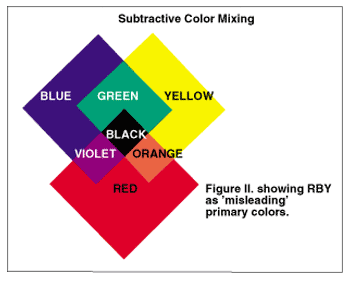
from Color Theory – click through to see why it’s labeled ‘misleading’
With subtractive color, mixing paints results in dark and darker colors. Most computer displays, however, are based on additive color. In this model, we mix red, green, and blue lights to make different colors.
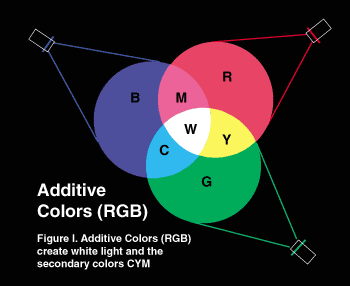
from Color Theory again
Subpixels
A pixel in most display technologies is actually a composition of three different lamps. They are so tightly packed that we usually cannot distinguish them independently, so they activate our cones as if they were producing a single wavelength. Below is a photo of two versions of the iPad display under a microscope (the iPad 3 on the left is Apple’s Retina display).
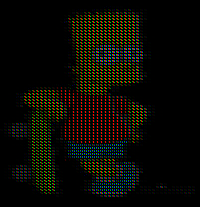
On some large displays, you can see these “subpixels” with the naked eye, if you stand close enough. The following is a close-up of the display outside the Brooklyn Academy of Music on Flatbush Avenue. You can clearly see the pixels have six lamps: two red in the center, and the green and blue on opposite corners.
I wrote a little program to render images in a simulation of the subpixel layout of the BAM sign. If you right-click below and open Bart in a new tab, you can zoom in (control-plus). You’ll see that what you perceive as yellow at a distance is actually just red and green; the whites of Bart’s eyes are just red-green-blue.
Color encoding
Now, back to encoding color images as bits. Imagine using 3 bits per pixel. (We call the number of bits used to represent the color of a single pixel the color depth of the image.) We would map each bit to one of the Red-Green-Blue primary lamps. That leads to these eight colors:
- 0 = 000 = black
- 1 = 001 = blue
- 2 = 010 = green
- 3 = 011 = cyan
- 4 = 100 = red
- 5 = 101 = magenta
- 6 = 110 = yellow
- 7 = 111 = white
Some systems extended this to 4-bit color, using the 4th bit to indicate extra brightness of all the lamps at once. That produces 16 colors like the following. See also my 4-bit color demo.
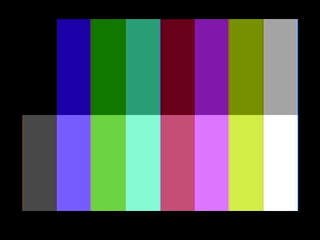
from Wikipedia on the IBM Color Graphics Adapter (1981)
Now let’s expand to 6-bit color. Since it’s a multiple of 3, we can control the brightness of each lamp independently: 2 bits for red, 2 bits for green, 2 bits for blue. We’ll interpret the two bits as:
- 0 = 00 = off
- 1 = 01 = low
- 2 = 10 = medium
- 3 = 11 = high
Then the color 110110 combines bright red, dark green, and medium blue. When all three lamps are the same brightness, we get shades of gray. so 000000 is black, 010101 is dark gray, 101010 is light gray, and 111111 is white. In total, there are 2⁶ = 64 possible colors with 6 bits.
We can apply the technique to any multiple of three: 9-bit color (512 possible colors), 12-bit color (4,096), and so on. Skipping these, our next stop will be 24-bit color. It’s also known as true color, since it is believed to be more colors (16 million!) than any human can perceive anyway. Using 8 bits (one byte) for each lamp, we get to dial the brightness from 0–255. Expressing these 8 bits as two hexadecimal digits, that range is 00–FF.
So true colors are six-digit hexadecimal numbers, like 6B1CC6. Let’s decompose that into bits:
 6        B         1        C         C        6
 0 1 1 0  1 0 1 1   0 0 0 1  1 1 0 0   1 1 0 0  0 1 1 0
 <-----Red------>   <----Green----->   <-----Blue----->
With this color, we have the red lamp at \(6B_{16} = 107_{10}\) (out of 255, or 42%) brightness. The green lamp is \(1C = 28\) out of 255, or 11% brightness. The blue lamp is \(C6 = 198\) out of 255, or 78% brightness. Obviously, blue is the dominant color, with red next. Here is a sample of 6B1CC6:
You can play with hex true colors by adjusting sliders in my 24-bit color demo, and there’s a color quiz called What the Hex?
Further information:
- Magenta doesn’t exist — Here’s why (wonderful demonstration video with Steve Mould)
- Example of physiological color afterimage, from BBC Four’s The Spectrum of Science [video] and physicist Helen Czerski: False color / B&W
Image formats
The representations we’ve explored so far – simply writing the bits representing pixel colors – is known informally as a bitmap. There’s a BMP image format based on this, but it contains additional bits to specify the color depth, image size, and some other capabilities. The three formats we’ll concentrate on are PNG, JPEG, and GIF.
PNG (Portable Network Graphics) is a compressed image format that supports 24-bit color. It’s a great choice for comics, drawings, logos, and icons.
JPEG (Joint Photographic Experts Group) is also compressed, but it’s designed especially for photographs. Unlike PNG, the compression in JPEG is lossy – it actually throws away some of the information in the original image, so it can achieve a smaller file size. In photographs the lossage is mostly not noticeable, although if you intend to crop and edit your photos it’s best to compress only once, at the very end. Each time you edit and save a JPEG, more information is lost.
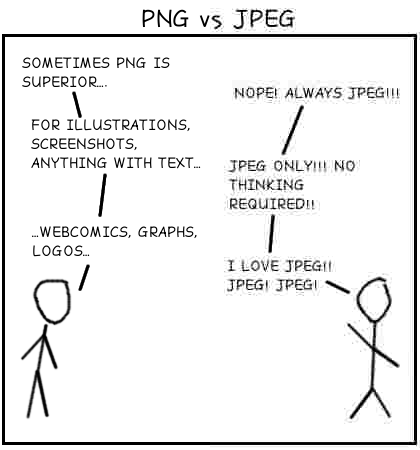
A (slightly exaggerated) look at using JPEG for line drawings, by Louis Brandy
GIF (Graphic Interchange Format) is a relatively old format, but it remains popular in some applications mainly because it supports simple animation. The format can contain a sequence of images that are then displayed in quick succession, and usually looped. The pixel content is compressed using the lossless LZW algorithm.

GIF animation
The big weakness of GIF is that each image can use at most 256 colors. That’s because the pixel data are encoded using 8 bits per pixel. A program that creates a GIF can choose which 256 colors out of the full 16-million 24-bit colors to use, so that helps a bit. But it remains a poor choice for photographs, which usually have subtle color gradations across highlights and shadows.
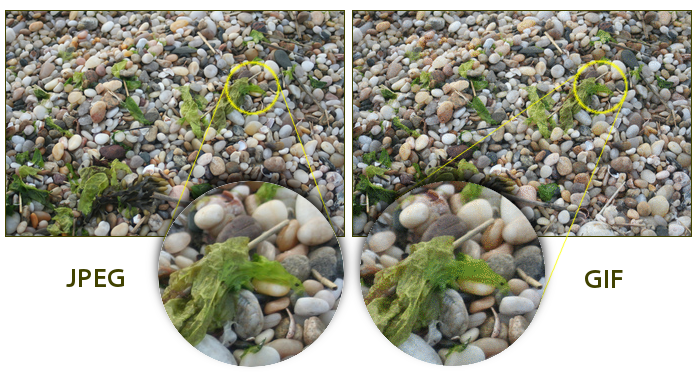
Image compression
In this section, we’ll look in further detail about one method for lossless image compression. This technique is known as Run-Length Encoding (RLE). We’ll use this 16×11 pixel flag image as an example. It is shown zoomed in on the left, so all the pixels are independently visible, and then zoomed out on the right. The yellow strips and darkened edges are meant to give it a slightly three-dimensional look.
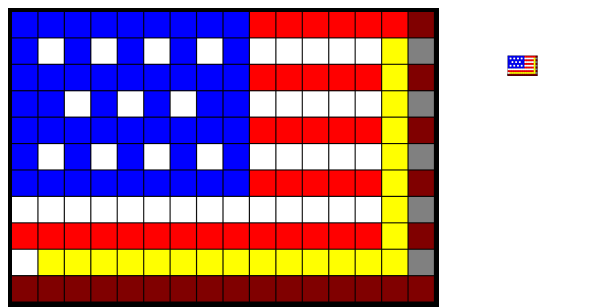
The image uses the colors red, white, blue, yellow, dark red, and dark white (light gray). Let’s represent the colors using 4 bits, where the fourth (left-most) bit indicates brightness, as in the 1981 CGA image above, or my 4-bit color demo.
COLOR        BITS  HEX
red          1100    C
white        1111    F
blue         1001    9
yellow       1110    E
dark red     0100    4
dark white   0111    7
The simplest (bitmap) encoding is to write the four bits for each pixel, in order from left to right and top to bottom. So in one byte, we can represent two pixels. The total number of pixels is 16×11 = 176, so that’s 176÷2 = 88 bytes. The first few rows would be encoded as these bytes (hex notation):
99 99 99 99 9C CC CC C4
9F 9F 9F 9F 9F FF FF E7
99 99 99 99 9C CC CC E4
To compress this image using run-length encoding, we would specify first the color, and then the number of horizontal pixels to paint with that color. For example, the first row would say “9 pixels of red, then 6 pixels of white, then 1 pixel of dark red.” Each instruction can be encoded as one byte: the first four bits for the number of pixels (up to 15), and then another four bits for the color of those pixels. So the first row would be represented by just these three bytes:
99 6C 14The second row would require many more instructions, because it alternates colors so much:
19 1F 19 1F 19 1F 19 1F 19 5F 1E 17Then the third row:
99 5C 1E 14Unless every row contains a lot of alternation, this will tend to save quite a few bytes. My estimate is:
  Row  1:  3 bytes
  Row  2: 12 bytes
  Row  3:  4 bytes
  Row  4: 10 bytes
  Row  5:  4 bytes
  Row  6: 12 bytes
  Row  7:  4 bytes
  Row  8:  3 bytes
  Row  9:  3 bytes
  Row 10:  3 bytes
  Row 11:  2 bytes
   TOTAL: 60 bytes (~32% reduction)
Further reading:
- How JPEG handles colors and compression (with video from Computerphile)
Image steganography
Steganography is a way of sending a secret message to someone, where the message is “hidden in plain sight.” If you don’t know to look for it, you never notice it’s there.
This section demonstrates an image steganography program that I wrote. It takes a normal true-color image and manipulates the lowest two bits of each color byte, storing a secondary 6-bit color image there. The changes this entails are so minor, you never notice they are there. (This works only with lossless compression; if you store the photo as a typical JPEG, its lossy compression will disrupt the hidden image.) You can reveal the hidden image by clicking the left-shift button (<<) six times.
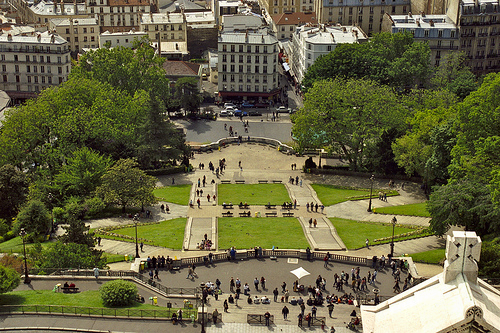
The image-within-image steganography technique works best with photographs, where there are subtle gradations of color everywhere. If you start with a cartoon-style image, with large solid blocks of unvarying color, it’s easier to see the hint of the inner image. Here is an example. Depending on how good your monitor and eyes are, you can make out some outlines of the 6-bit hidden image, before shifting the pixel values.

It’s maybe even a little more visible when the inner image is a cartoon too.
