Important dates
Meeting 6: (Module 5) Introduction to the goals and kinds of testing, and procedures for test-case selection.
Assignment 5a due at 23:59: Test plan.
Meeting 7: (Module 5–6) General feedback on your test plans, assistance with the tools for automated testing and coverage.
Assignment 5b due at 23:59: Testing report.
Resources
- Lecture notes
- JUnit Cookbook
http://junit.sourceforge.net/doc/cookbook/cookbook.htm - EclEmma Manual
http://www.eclemma.org/index.html - Software Engineering Radio, Episode 70: Gerard Meszaros on xUnit Test Patterns
http://se-radio.net/
Notes
The software you will be testing in this assignment is an implementation of an AATree, a balanced binary tree structure that can be used to represent sets of elements with efficient search, insertion, and deletion.
Balanced binary trees work on any elements that are Comparable — where you can determine whether two elements are equal, or one is less, or greater than the other. We can use integer elements in our tests, but the structure should work for other types of elements too. (Arbitrary elements can be made Comparable by assigning them an integer primary key, and then comparing those keys.)
The data type supports the following operations:
t.insert(x)inserts the elementxinto the treet. If that element already exists in the tree, then it raisesDuplicateItemException.t.remove(x)removes the elementxfrom the treet. If that element does not exist in the tree, then it raisesItemNotFoundException.t.find(x)returns the element equal toxin treet, if it exists. If no such element exists, it returnsnull.t.findMin()returns the smallest item int, according to theComparableordering. Iftis empty, it returnsnull.t.findMax()returns the largest item int, according to theComparableordering. Iftis empty, it returnsnull.t.isEmpty()returnstrueif the treetcontains no elements, orfalseif it contains one or more elements.t.makeEmpty()modifies the treetby removing all of its elements.
Assignment
Part A
A1: Write a test plan
Using the descriptions of the AATree operations above, write down a set of test cases that, when implemented, will verify whether the data structure works. For now, you can write them in a text file or a document. Later on, we’ll implement them in Java using JUnit.
Here are some examples of test cases:
Test case 1: behavior of find on an new tree
Create an new tree, t.
t.find(32) should return null.

Test case 2: interaction of isEmpty and makeEmpty
Create a new tree, t.
t.isEmpty() should return true.
Execute t.insert(3)
t.isEmpty() should return false.
Execute t.makeEmpty()
t.isEmpty() should return true.

Test case 3: remove produces ItemNotFoundException
Create a new tree, t.
Execute t.insert(9)
t.remove(8) should produce an ItemNotFoundException
Start with these, then continue with your own. I don’t know how many test cases you will have, but try to test all the operations given in the previous section, and any interactions between them you can imagine.
A2: Set up Eclipse and plugins
To get ready for part B of this assignment, you will need the Eclipse IDE along with two plugins. This is free software that runs on every platform. It can, however, be complicated to set up, so start on this early and alert me of any problems you encounter.
Go to
http://eclipse.org/downloads/and download the package “Eclipse IDE for Java Developers” version 3.7.1 (Indigo) for your operating system. It should auto-detect your OS (Windows, Mac, or Linux), but if not, there is a drop-down. You may need to know whether your system is 32- or 64-bit. If in doubt, try 32-bit.Unzip the eclipse package (you have to “extract all files” to another folder), and look for the application file inside. Run that application. At this point, if it complains that you do not have Java installed, go to
http://www.java.com/en/download/index.jspto try to resolve that.Once you have started Eclipse successfully, go to Help → Eclipse Marketplace… on the menu.
In the search box, type Subclipse and hit the Go button. It should show you the Subclipse plugin by “Subclipse Project, EPL” as the first match. Click its Install button and follow the prompts, including restarting Eclipse when it is finished.
Follow the same procedure to search for and install a plugin called EclEmma by “Mountainminds, GmbH”.
After you have installed both plugins and restarted Eclipse, we will try to check out a project from Subversion.
Part B
B0: Check out a project
NOTE: Unfortunately, I had to modify the directions for the last segment of part A. If you already have JavaTest checked out, but you have not modified AATest.java, please remove the project (and delete its contents on disk) by right-clicking and choosing Delete in the package explorer.
If you did already make changes to AATest.java, then copy those out into a text file somewhere, so you can reproduce them. Then, remove the project as above.
In Eclipse, select File → New → Project… and type
svnin the search box. Select “Checkout Projects from SVN” and hit Next.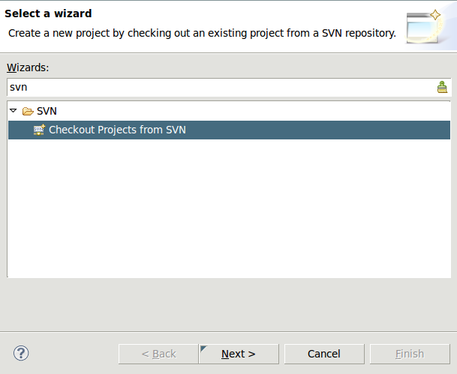
Checkout Projects from SVN
You will create a new repository location with the URL
https://liucs.net/svn/cs633f11/branches/USERNAME/(but replace “USERNAME” with your Subversion user name). Hit Next to continue. (If this repository is already shown, just select it and continue.)The next screen should validate your repository URL (and ensure that Subclipse is installed correctly), and show you a list of project folders within your branch. If you get errors in this step, please notify me with the exact details as soon as possible.
Select the JavaTest folder to import, and click Next (don’t finish yet, we need to specify one more option).
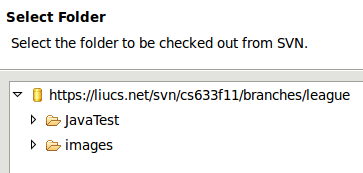
Select JavaTest folder
Choose “Check out as a project configured using the New Project Wizard” and Finish.
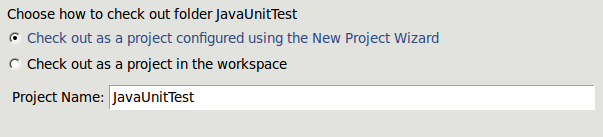
Checkout using wizard
Eclipse will immediately pop up the new project wizard again. This time, select Java → Java Project and hit Next.
Give it the project name
JavaTestand hit Finish. It will warn you about “resources other than the.projectfile,” just hit OK.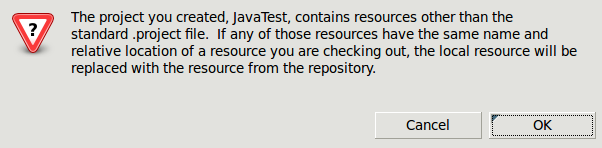
Eclipse .project warning
Subversion will do its thing. Once it has completed, you should have JavaTest in your Package Explorer on the left. Its structure should look something like below. Note: Be sure it refers to
junit.jarunder Referenced Libraries, or else it will not work.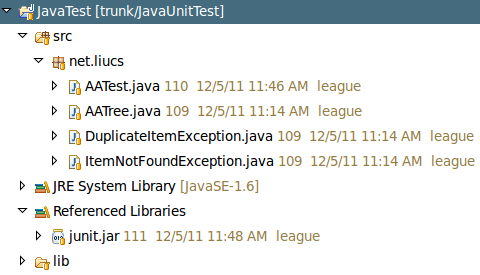
JavaTest package contents
B1: Implement your test plan
First we need to convert your test cases to Java code using JUnit. Within Eclipse, find the file AATest.java in the src → net.liucs subtree of the Package Explorer in the left pane. Double-click to open it in an Eclipse editor window.
You will see a series of method definitions marked with the annotation @Test. Here is one example from that file:
    @Test(timeout=8000)
    public void findEmpty()
    {
        AATree t = new AATree();
        assertNull(t.find(32));
    }
The @Test annotation marks this method as a test case. It has a parameter timeout=8000, which means that if the test takes longer than 8 seconds (8,000 milliseconds), it should be considered a failure. This helps detect infinite loops in the code being tested.
Your test-case definitions will always use public void, but the identifier after that is up to you. Try to use a short descriptive name for your test case. The name cannot contain spaces or punctuation, but we often capitalizeAdditionalWords.
Within the braces is the code of your test. You can investigate the examples in that file, but below I’ll show you exactly how to translate the sort of pseudo-code we used in part A to Java and JUnit.
Creating a new tree
When your pseudo-code calls for a new tree, and gives it a name like t, that is fulfilled by the following code:
AATree t = new AATree();You can replace t with any variable name you want, so if your test calls for multiple trees then use t1, t2, or t, u, v.
Checking what an operation returns
Your tests probably have statements like “operation t.blahBlah() should return 5.” In JUnit, these are called assertions. You use different assertions depending on the expected return type.
If you expect an operation to return a Boolean value (true or false), then it looks like these:
    assertTrue(t.isEmpty());
    assertFalse(t.isEmpty());
If you expect an operation to return null, it looks like thiS:
assertNull(t.find(32));If you expect an operation to return another value, such as an integer, try this:
assertEquals(5, t.findMin());The above means that the operation t.findMin() should return the integer 5.
Checking for exceptions
Some operations say they should raise exceptions (errors) under certain conditions. An example from the specification is: t.remove(x) removes the element x from the tree t. If that element does not exist in the tree, then it raises ItemNotFoundException.
Our pseudo-code example says “t.remove(8) should produce an ItemNotFoundException.”
The way to check for this is in the @Test annotation above your method definition. You add a parameter expected= with the class name of the expected exception:
@Test(timeout=8000, expected=ItemNotFoundException.class)With that parameter, the test case is consider to succeed if the ItemNotFoundException occurs. If the code completes normally, with no exception, that is considered a test failure.
B2: Check code coverage
With
AATest.javaopen in your editor, hit the “run” button on your tool bar. It looks like this:
Run button
Eclipse might ask you to confirm the launch configuration. If you see a dialog like this, use configuration-specific setting and the Eclipse JUnit Launcher:
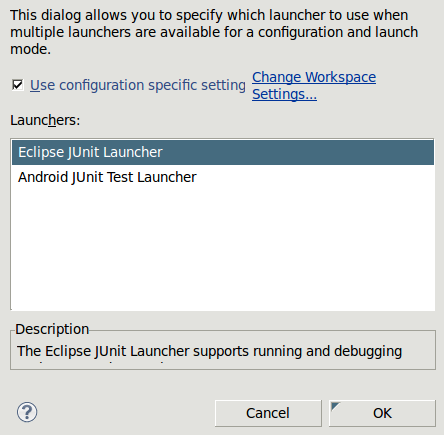
JUnit Launch confirmation
If all went well, you should see a JUnit results pane in the left sidebar (it’s a tab next to the Package Explorer). This result shows that 4 out of 4 tests succeeded.
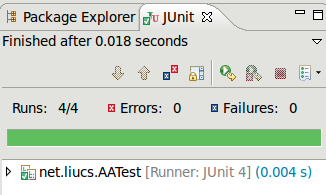
JUnit results pane
Now you can try to run the tests with a coverage report. That is done using this button:

Coverage button
You will see the same JUnit results pane, but now the source code will be highlighted red and green to show which lines have been executed by your tests. There is a full coverage report in the bottom pane.

Eclipse running JUnit with coverage report
If you open up JavaTest → src → net.liucs you mainly want to look at the percentage for
AATree.java. It looks like we are getting 62.8% as a baseline. Adding more comprehensive tests should improve that.
B3: Submit your code
To submit your code, right-click on the project in the package explorer, and select Team -> Commit…. Type your commit message in the window and hit okay. If Eclipse says “Committed revision 124” (or whatever number we’re up to), then you’re done!
©2011 Christopher League · some rights reserved · CC by-sa