Software setup
We will need the following software set up on whatever computer(s) you plan to use for this course. It should all work equally well on Mac, Windows, or Linux. These are somewhat ‘bare bones’ instructions, so ask questions on the issue forum if you encounter any problems.
Git setup
- ⇒ Video explanation [14:33]
Git is a version control tool that helps developers keep track of any changes that are made to a set of files. We’ll also use it to submit and collaborate on assignments. You may have heard of GitHub, a social code-sharing site. We’ll be using a similar site, but on a private server.
Create an account at https://gitlab.liu.edu/ (the “Register” tab). You’ll have to use your LIU email address to sign up. You should receive the confirmation link within a few minutes, otherwise check your junk folder too. After completing the registration, you can set a different email address in your profile, if you prefer.
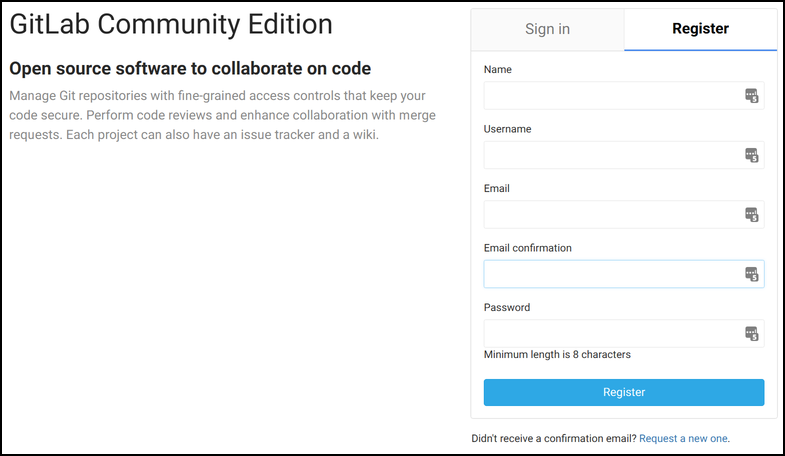
GitLab registration form
Download the Git tool for your platform at https://git-scm.com/downloads and run the installer. The default settings should be fine.
Open the Git Bash application on Windows, or use Utilities » Terminal on Mac. Type these commands, replacing your actual name and email address in the double quotes:
git config --global user.name "YOUR NAME"
git config --global user.email "YOUR.ADDRESS@EXAMPLE.COM"
If you know you already have an SSH key pair, you can skip this step. Otherwise, in the Git bash terminal enter
ssh-keygen. You’ll press enter for all the defaults, including an empty passphrase. It should go something like this:$ ssh-keygen Generating public/private rsa key pair. Enter file in which to save the key (/c/Users/league/.ssh/id_rsa): Created directory '/c/Users/league/.ssh'. Enter passphrase (empty for no passphrase): Enter same passphrase again: Your identification has been saved in /c/Users/league/.ssh/id_rsa. Your public key has been saved in /c/Users/league/.ssh/id_rsa.pub. The key fingerprint is: b7:27:3e:8d:83:df:9a:21:c7:27:0d:fa:43:ac:d0:7e league@WIN7Now you’ll want to access the public part of the key that it generated. It’s easiest to open it in a text editor, using:
- On Windows:
notepad .ssh/id_rsa.pub - On Mac:
open -e .ssh/id_rsa.pub - On Linux:
cat .ssh/id_rsa.pub
The editor will pop up with a line that begins
ssh-rsa AAAA… copy the whole thing onto your clipboard.- On Windows:
Log in to your gitlab.liu.edu account. From your user icon in the upper right, select Settings, then SSH Keys. Paste your public key into the big text box, then use the green button Add SSH Key. The title should populate automatically when you click it. If not, just enter “my key” or a nickname to identify your computer, like “my Dell laptop.”
Use the upper left menu to go back to your projects list. Click the green New Project button. In the project path box, leave the drop-down set to your username, but enter your last name followed by
-CS691(no spaces) for the project name. Keep the visibility level private, then confirm with the green Create Project button.Your new project page will say “The repository for this project is empty.” Click the adding a README link below that. You’ll be placed in a text editor with the title
README.md. Type your name and something about yourself: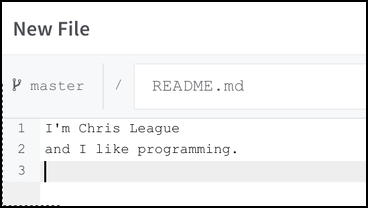
Add new README file
Below the editor is space for a Commit message. In that box, type something like “Created README,” (it may already be filled for you) and then click the green Commit Changes button.
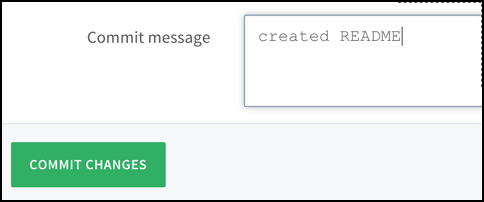
Specify message and commit changes
Next, while looking at your project page, click the Settings (gear icon) in the left sidebar, then select Members. In the Search for members box, type
leagueand select the user just namedleague, with my picture. Change the permissions drop-down to Developer and then click the green Add to Project button.
Clone and sync
Now we’ll use the installed Git system to connect a folder on your machine to your new project on the GitLab server.
Decide where you want the folder to live, such as in your Desktop or Documents folder. Open up Git Bash (Windows) or Utilities » Terminal (Mac) and go to your selected directory using the
cdcommand:cd DesktopOn your GitLab project page, find the
ssh://gitaddress and copy that entire thing to your clipboard. (The button just to its right will probably work.)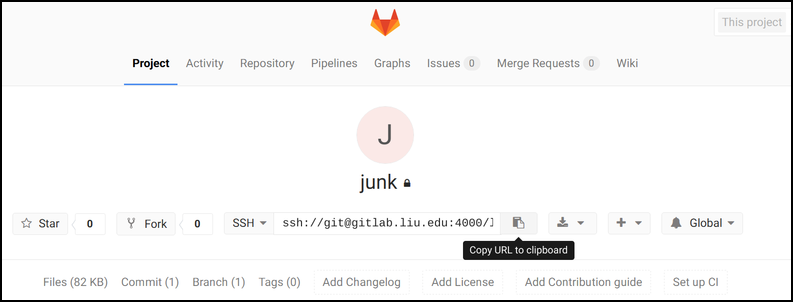
Back in your bash/terminal, type
git cloneand then paste in the URL. (On Windows, control-V may not work to paste, but there should be a paste option on the right-click menu.)After the address, add another space and then the name of the new folder that will be synchronized. I’d recommend just naming it after the course (
CS691or maybeCS691-repo).Here’s the complete command (your address will differ):
git clone ssh://git@gitlab.liu.edu:4000/USER/NAME-CS691.git CS691Hit enter. Here’s a transcript of what will happen:
Cloning into 'CS691'...
remote: Counting objects: 3, done.
remote: Total 3 (delta 0), reused 0 (delta 0)
Receiving objects: 100% (3/3), done.
Now you have a new folder containing your
README.md.Descend into that new folder in your terminal, using
cd:cd CS691Use an editor on your system to make some kind of change to the
README.md. If I’ve recommended an IDE to you, you can do it there. Or you can install one of these:- On Windows: Notepad++
- On Mac: Sublime Text
- On Linux:
gedit
Just add another sentence or so to the file.
Git will be able to detect the change you made, and then you can snapshot it (called a commit) and synchronize it with the project on the GitLab server (called pull and push). The sections below describe how, either using purely the command-line, or using a GUI. Choose one, or try both.
Using just command line
- ⇒ Video explanation [12:56]
First I try to orient myself using the command
git status. It outputs:On branch master Your branch is up-to-date with 'origin/master'. Changes not staged for commit: (use "git add <file>..." to update what will be committed) (use "git checkout -- <file>..." to discard changes in working directory) modified: README.md no changes added to commit (use "git add" and/or "git commit -a")Which means it recognized my modification to the file. To see exactly what changed within the file, you can optionally do
git diff. It outputs:diff --git a/README.md b/README.md index e69de29..18249f3 100644 --- a/README.md +++ b/README.md @@ -0,0 +1 @@ +Hello world.The plus signs indicate lines added (usually green), minus signs indicate lines deleted (usually red).
Now we specify what changes to include in this commit (snapshot):
git add README.mdYou can specify multiple files at once, just separate them with spaces. If there are new files you created and want to commit, you would specify them there too.
Once you add the file, they are “staged” for commit, and another
git status(optional) will report that.Now we tell it to create the commit. Each commit automatically includes a timestamp and your name and email address. (You provided them earlier, using
git config.) But you also have to specify a “commit message” – a short piece of text that describes what you changed, or what you’re committing. The complete command is like this:git commit -m "Added another sentence to README"The output is something like:
[master 5b611c8] Added another sentence to README
 1 file changed, 1 insertion(+)
That hexadecimal number beside
master(in my case,5b611c8, but yours will be different) identifies the commit. Optionally, you can see a history of the commits usinggit log.A snapshot of your files has been saved locally, but it’s not yet available on the GitLab server. To synchronize with the server, I recommend this compound command:
git pull && git pushThe pull portion brings down any changes on the server that you don’t have locally. And then – only if that succeeds – it will push your local changes up to the server.
The pull could fail if there is a conflict – changes on the server that interfere with changes that you’ve made locally, in the same files. If that happens, you will have to fix the conflicts locally, add the changes, commit again, and then try to synchronize again.
Assuming the push succeeds, you should be able to visit the project page on GitLab and see the updated README file.
Using the built-in GUI
To start using the built-in GUI on your local repository, make sure you are in the correct directory, and then run:
git gui&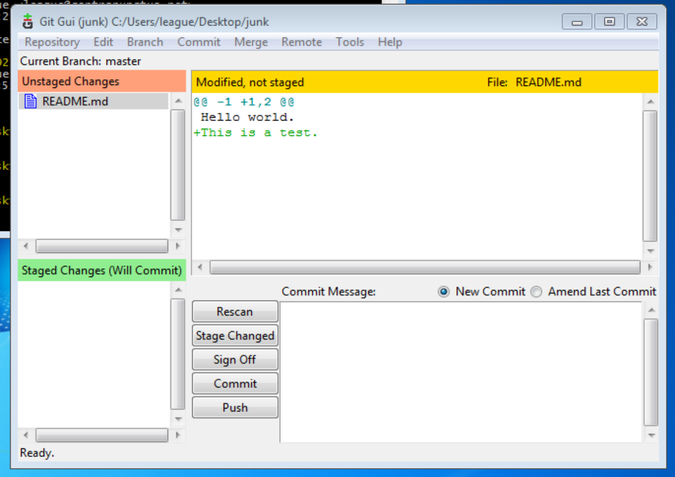
The built-in GUI
The GUI window shows the current status. In the screenshot above, we have one file modified, and it already shows the differences. Plus signs indicate lines added (in green), and minus signs indicate lines deleted (in red).
To specify what changes to include in this commit (snapshot), we need to move them to the “Staged Changes” section (lower left). You select one or more files in the Unstaged Changes and double-click them or use Commit » Stage to Commit from the menu, or press Ctrl-T.
If there are new files you created and want to commit, you would stage them too.
Each commit automatically includes a timestamp and your name and email address. (You provided them earlier, using
git config.) But you also have to specify a “commit message” – a short piece of text that describes what you changed, or what you’re committing. Type your commit message into the box in the lower right.Then you can hit the Commit button. The status bar at the bottom of the window will say “Created commit 5b611c8” or similar. That hexadecimal number (yours will be different) identifies the commit.
Optionally, you can see a history of the commits by selecting Repository » Visualize All Branch History from the menu.
A snapshot of your files has been saved locally, but it’s not yet available on the GitLab server. To synchronize with the server, I’d first recommend fetching and merging any changes:
- Use Remote » Fetch from » origin, and then if it reports any changes,
- Use Merge » Local Merge.
The fetch brings down any changes on the server that you don’t have locally. The merge portion could fail if there is a conflict – changes on the server that interfere with changes you’ve made locally, in the same files. If that happens, you will have to fix the conflicts locally, add the changes, commit again, and then try to synchronize again.
Next, you can hit the Push button next to the commit message box, and confirm it in the following dialog.
Assuming the push succeeds, you should be able to visit the project page on GitLab and see the updated README file.