Milestone 2
Due Monday 1 October at 1am
Enable Django admin
These were the changes needed to enable the admin interface:
bookswap/bookswap/settings.py, around line 14, adjust these settings:'ENGINE': 'django.db.backends.sqlite3', 'NAME': 'dbfile',bookswap/bookswap/settings.py, around line 27, you may want to set the time zone:TIME_ZONE = 'America/New_York'bookswap/bookswap/settings.py, around line 119, uncomment as directed:# Uncomment the next line to enable the admin: 'django.contrib.admin',bookswap/bookswap/urls.py, around line 4, uncomment as directed:# Uncomment the next two lines to enable the admin: from django.contrib import admin admin.autodiscover()bookswap/bookswap/urls.py, around line 15, uncomment as directed:# Uncomment the next line to enable the admin: url(r'^admin/', include(admin.site.urls)),
Now, in your command prompt, from the outer bookswap folder, you need to run the syncdb script like this:
liucs:~$ cd cs690/bookswap
liucs:~/cs690/bookswap$ ./manage.py syncdb
Creating tables ...
Creating table auth_permission
Creating table auth_group_permissions
[..etc..]

You just installed Django's auth system, which means you don't have superusers defined
Would you like to create one now? (yes/no): yes
Username (leave blank to use 'liucs'):
E-mail address: league@acm.org
Password:
Password (again):
Superuser created successfully.
Installing custom SQL ...
Installing indexes ...
Installed 0 object(s) from 0 fixture(s)
You can enter whatever you like for the user name, email address, and password, but I suggest keeping them short and simple because we’ll be doing this a lot. For example, during development I always make the password the same as the username, so it’s easy to remember. The email address has to look valid, but we won’t send any email to it, so it’s okay if you make up something short, like user@foo.org.
Now, if you do runserver like we did last time:
liucs:~/cs690/bookswap$ ./manage.py runserver
Validating models...

0 errors found
Django version 1.4.1, using settings 'bookswap.settings'
Development server is running at http://127.0.0.1:8000/
Quit the server with CONTROL-C.
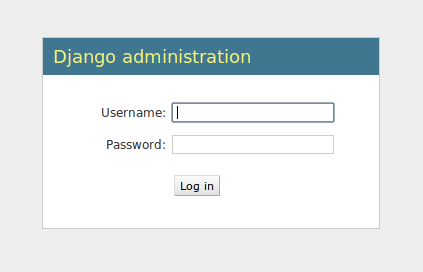
Then you can visit the admin site at http://127.0.0.1:8000/admin/ (or use the ‘localhost/admin’ button in your bookmarks bar). You should see the login window.
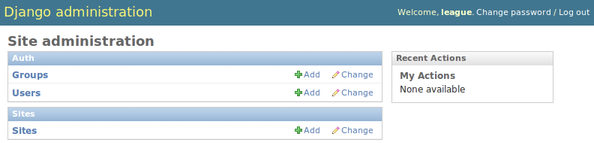
You can use the super-user account you created during the syncdb. Then you will see the admin screen, with links to the built-in entities like Users and Groups. Play with this, creating some users for your site.
Create an app
Our Django project is bookswap, but a project in Django is a container for different apps that make up your service. For simplicity, we’ll probably stick with using just one app throughout the project, so let’s call it main. Create it like this:
liucs:~/cs690/bookswap$ ./manage.py startapp main
You will now find a folder called main with the following files:
__init__.pymodels.pytests.pyviews.py
Open up models.py. Here is the model we tested in class, as a starting point:
from django.db import models
from django.contrib.auth.models import User
from django.contrib import admin

# MVC = Model, View, Controller
# Models represent the data objects in the system.

class Article(models.Model):
    title = models.CharField(max_length=100)
    body = models.TextField()
    rating = models.FloatField()
    posted_at = models.DateTimeField(auto_now_add=True)
    author = models.ForeignKey(User)

    def __unicode__(self):
        return self.title + ' at ' + str(self.posted_at)

admin.site.register(Article)
To get it to work, we need the following change:
bookswap/bookswap/settings.py, around line 111, add'main'to theINSTALLED_APPS:INSTALLED_APPS = ( 'main', 'django.contrib.auth', # etc...
And then you can re-run syncdb. (You won’t need to recreate the super-user at this time, but it should say it is ‘Creating table main_article.’
liucs:~/cs690/bookswap$ ./manage.py syncdb
Creating tables ...
Creating table main_article
Installing custom SQL ...
Installing indexes ...
Installed 0 object(s) from 0 fixture(s)
Now, when you runserver again and visit the admin URL, you’ll see the ‘Main’ section with the ‘Articles’ model within it.
Build models in Django
Now you can explore the Django documentation about model-building. See especially the sections “Model syntax” and “Field types.” You can find the documentation in two places:
https://docs.djangoproject.com/en/1.4/– this is the online versionfile:///var/lib/vm-admin/doc/django/ref/contrib/admin/index.html– this is a version you can access only in the browser on your VM, because I installed the documentation locally for you. If this doesn’t work, you may need to update your VM like this:liucs:~$ sudo liucs-update-vm
With each new model you create, you’ll have to do the admin.site.register, and then a syncdb on the command line. You’ll notice, however, that syncdb cannot update an existing table, it only creates new ones.
So occasionally, you may have to recreate the database from scratch. We’ll find better ways to handle this later, but for now I believe it’s the simplest way. To recreate, just remove the database file and then run syncdb again:
liucs:~/cs690/bookswap$ rm dbfile
liucs:~/cs690/bookswap$ ./manage.py syncdb
As you experiment, start thinking about the models we’ll need for our bookswap project. Please commit some draft model code by class next week, 24 September, so we can look at it and discuss the models we’ll need.
Compose queries
TBD