A Tour of the Cloud
Using rackspace.com, I created six (virtual) servers in the “cloud.” (Actually, they’re in Chicago.) Their names are almond, bisque, coral, forest, gold, and honeydew. You’ll receive a piece of paper containing the password, IP address, and host key.
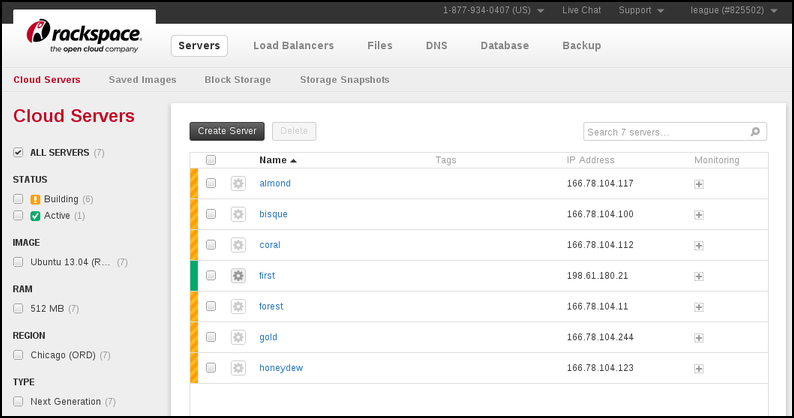
My Rackspace servers
Log in
The first step is to log in to your server. We will be logging in as root, which is the name for the all-powerful administrative user on Unix systems. It is also known as the super-user.
We’ll connect to the machine using the Secure Shell (ssh) protocol. On Windows machines, the simplest way to do ssh is a program called “PuTTY.” When you start PuTTY, you’ll see a configuration window. You only need to fill in the IP address of your server, and then click Open.

PuTTY configuration panel
PuTTY will probably alert you about the server’s host key. Spot-checking this against the key I gave you is probably a good idea.
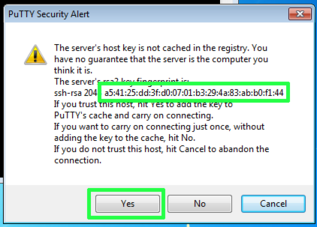
Check the host key, click Yes
Next you’ll be prompted for your login name. Type root and press enter. After that, type the password I gave you. Be careful about upper- and lower-case letters. The password prompt will not echo your keystrokes with asterisks or anything else. It’s still working – just press enter when you’re done.

Login and password prompt
You should see the Ubuntu GNU/Linux welcome message, and a prompt that indicates your user name and host name:
Welcome to Ubuntu 13.04 (GNU/Linux 3.8.0-19-generic x86_64)

 * Documentation:  https://help.ubuntu.com/
Last login: Tue Apr 30 19:17:51 2013 from 148.4.40.14
root@almond:~#
When a Unix prompt ends with a pound sign (#), it means you are a super-user and so you should be very careful about what commands you enter! (These machines are temporary anyway, so don’t worry – you won’t do any permanent damage.)
The text size in PuTTY can be quite small for aging eyes like mine. You should enlarge it so your lab-mates can see what’s going on. Click the application menu (upper left) and select Change Settings…
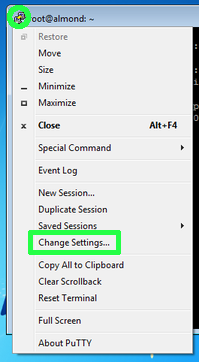
PuTTY application menu
On the configuration screen, look for Window » Appearance, and hit the Change button next to the Font. Apply.
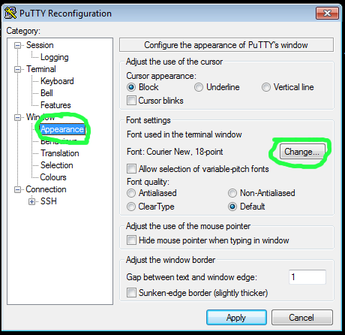
PuTTY font settings
A quick orientation
Take another look at the Unix prompt. Besides the user name, host name, and super-user pound sign, there’s one other part of the Unix prompt I neglected to mention: that tilde character: ~
root@almond:~#
That part of the prompt represents your current working directory, and the tilde is an abbreviation for the current user’s home directory. (‘Directory’ is just an older name for what you might call a folder on Windows or Mac.)
You can ask more specifically which directory we’re in with the command pwd (print working directory):
root@almond:~# pwd
/root
The response, /root, means we’re in a directory called root, which is right underneath the top level of the file system (indicated by the slash). That top level, /, is also called “root,” which means we’re using the same word for three different things – so far!
Let’s get a listing of the other files and directories at the top level, using the command ls (list). The space between the command (ls) and the parameter (/) is required.
root@almond:~# ls /
bin   etc         lib         media  proc  sbin     sys  var
boot  home        lib64       mnt    root  selinux  tmp  vmlinuz
dev   initrd.img  lost+found  opt    run   srv      usr
In your PuTTY window, these names should be color-coded. The dark blue ones are directories, others are files. Try listing the contents of some of those top-level directories:
/etc(sometimes pronounced “etsy”) contains system configuration files./bincontains essential system programs/proccontains information about running processes and the Linux kernel./devcontains files that represent input/output or storage devices connected to the system.
To count how many files or sub-directories are in each of those, we can create a little pipeline to the word-count command, wc, like this:
root@almond:~# ls / | wc -l
23
That vertical bar character | (called the “pipe”), is typed as shift-backslash.
How many entries are in the
/etcdirectory? _____How many entries are in the
/bindirectory? _____How many entries are in the
/procdirectory? _____How many entries are in the
/devdirectory? _____
So far, we are peering into these other directories from within our home directory, ~ aka /root. But you can also change to another directory, so it is considered ‘current.’
root@almond:~# cd /etc
root@almond:/etc#
Notice how the prompt changed. Now any commands I give are executed within that directory. Without any parameter, cd goes back to your home directory:
root@almond:/etc# cd
root@almond:~#
We’ll learn one more command in this section – perhaps the most important Unix command: man shows you the “manual page” for other commands, configuration files, and lots more. On its own, it’s not very helpful:
root@almond:~# man
What manual page do you want?
But you just give the command name after man and it will show you the page:
root@almond:~# man ls
LS(1)                    User Commands                    LS(1)

NAME
       ls - list directory contents

SYNOPSIS
       ls [OPTION]... [FILE]...

DESCRIPTION
       List  information about the FILEs (the current directory
       by default).  Sort entries  alphabetically  if  none  of
       -cftuvSUX nor --sort is specified.
[...more...]
At the bottom of the screen, you’ll see a status bar that shows what you’re viewing:
Manual page ls(1) line 1 (press h for help or q to quit)You can use the page down (space), page up (or b), hit slash / to search for something, or q to quit and return to your prompt.
If you don’t remember the name of the command you want, man can search through the manual for keywords, using the -k option:
root@almond:~# man -k disk
How many manual entries are there for the keyword
disk?How many manual entries are there for the keyword
compress?What is the purpose of the command
df?
User accounts
With great power comes great responsibility. The super-user account, root, is necessary for system administration, but you want to avoid it for everyday activities like checking email, composing web pages, or writing code. In this section, we’ll learn how to create regular, unprivileged user accounts, and then we’ll log in to each others’ machines using them.
Linux includes a command adduser that creates new user accounts. Its use is very simple: just type the username as a parameter. The username should be all lower-case, and contain no spaces. Here’s an example:
root@almond:~# adduser alice
Adding user `alice' ...
Adding new group `alice' (1000) ...
Adding new user `alice' (1000) with group `alice' ...
Creating home directory `/home/alice' ...
Copying files from `/etc/skel' ...
Enter new UNIX password:
At the bottom, it is prompting you for the password on alice’s account. Type one and press enter. (Again, it will not echo asterisks back to you.) Then, the command will ask you to retype the password. This helps ensure that you didn’t mistype the first time.
Retype new UNIX password:
passwd: password updated successfully
Now, it asks you a series of questions for the user database. You can leave all these blank by pressing enter repeatedly, until you’re back at your regular prompt.
Changing the user information for alice
Enter the new value, or press ENTER for the default
        Full Name []:
        Room Number []:
        Work Phone []:
        Home Phone []:
        Other []:
Is the information correct? [Y/n]
root@almond:~#
Repeat those steps to create three or four different accounts. Write down the usernames and passwords you chose on scrap paper.
Recall that Unix keeps configuration files in the /etc directory. One of those configuration files is the user database – it is known as /etc/passwd. You can see its contents with this command:
root@almond:~# cat /etc/passwd
[...others...]
alice:x:1000:1000:Alice,,,:/home/alice:/bin/bash
bob:x:1001:1001:Bob,,,:/home/bob:/bin/bash
charlie:x:1002:1002:Charlie,,,:/home/charlie:/bin/bash
The users you just created will be at the bottom. The fragment of each line that begins with /home/ is that user’s home directory. You can see these home directories with:
root@almond:~# ls /home
alice  bob  charlie
Recall also that I mentioned storing hashed passwords, which makes it more difficult to discover a user’s password. These hashes are kept in /etc/shadow. I’ll just show one of them, for my user bob, but you should investigate the passwords for your own users.
bob:$6$0JV6jRa1$GtyNXgpEm9eoxDgr9d5QuKtyB.TbzBBkcaC00uZktFcpuM0IulbG5GO8yw5tTCxshT4YJ82rPtWRMJApvr/2u.:15825:0:99999:7:::The $6 is a kind of version number. The portion between the next two dollar signs, $0JV6jRa1$ is the salt. From there to the colon is the hash itself.
Now, write down your server’s IP address on the scrap paper with the user account information, and pass it to another group. Wait until you receive the account information from that group, and then continue.
Let’s log in to the other group’s server, using the user accounts and passwords they created. You can log in from multiple machines, or open up new instances of the PuTTY application.
This time, when it says login as:, use the username of the account instead of root.
login as: alice
alice@166.78.104.117's password:
You can also log in directly on your server, using the command ssh:
root@almond:~# ssh alice@166.78.104.100
Again, you might have to answer that host key question. Strangely, you have to type out yes, not just y.
The authenticity of host '166.78.104.100 (166.78.104.100)' can't be established.
ECDSA key fingerprint is 8d:6c:14:0d:0b:ff:ce:95:fa:6a:33:fd:94:c3:03:78.
Are you sure you want to continue connecting (yes/no)?
After you give the correct password, your prompt will indicate the user name and host name of your identity on the new machine.
alice@bisque:~$
Notice that the prompt changed from a pound sign (#) to a dollar sign ($). That’s your indication that you are not a super-user on the new machine.
Once a few of you are logged in to the same server, here’s a command you can try. It will tell you who else is logged in, where they came from, and when.
alice@bisque:~$ who
root     pts/0        2013-04-30 20:50 (166.78.104.117)
alice    pts/1        2013-04-30 21:19 (148.4.29.14)
bob      pts/2        2013-04-30 21:21 (localhost)
charlie  pts/3        2013-04-30 21:24 (liucs.net)
When you are done on the other group’s server, type exit to go back to your own.
Web server
Now we’re going to install web server software on your system, so it can respond to HTTP requests and host a web site. Let’s start by typing your server’s IP address into a web browser. It should give an error because there is no response from the server.
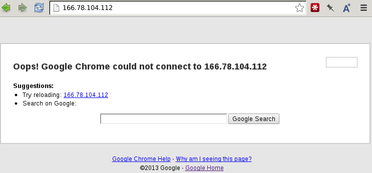
No web server is running yet
Back in PuTTY, make sure you are talking to your own server, and you are the super-user. (Remember the pound sign in the prompt?)
Type the following command. It may take a little time and ask you to confirm some changes.
root@almond:~# apt-get install nginx
The command apt-get refers to the Advanced Packaging Tool, available on Debian and Ubuntu Linux systems, and other derivatives. Other variations of Linux have similar commands.
The software we are installing, nginx (pronounced “Engine-Ex”), is a lightweight HTTP server. Once it is installed, we need to activate it, as follows:
root@almond:~# /etc/init.d/nginx start
After it reports that nginx has started, go back to your web browser and reload your IP address.
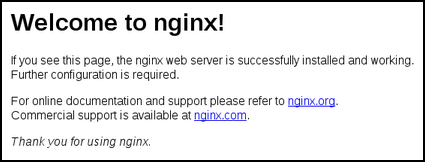
Now you should see the nginx welcome screen
Now you are going to edit the HTML file that is being displayed. It is stored in the directory /usr/share/nginx/html, so let’s go there:
root@almond:~# cd /usr/share/nginx/html
The file is called index.html. We need to open it in an editor. The simplest editor to use right now is nano, but if you’re going to become a proficient Unix user, you should definitely not stop there!
root@almond:~# nano index.html
The nano editor opens up full-screen, with the content of the HTML file:
  GNU nano 2.2.6       File: index.html

<!DOCTYPE html>
<html>
<head>
<title>Welcome to nginx!</title>
<style>
    body {
        width: 35em;
        margin: 0 auto;
        font-family: Tahoma, Verdana, Arial, sans-serif;
    }
</style>
</head>
<body>
<h1>Welcome to nginx!</h1>
                      [ Read 26 lines ]
^G Get Hel^O WriteOu^R Read Fi^Y Prev Pa^K Cut Tex^C Cur Pos
^X Exit   ^J Justify^W Where I^V Next Pa^U UnCut T^T To Spell
Those couple of lines across the bottom give you hints about the available commands. You can edit the file with the arrow keys (not the mouse), backspace, and delete. To save the file, use control-O, and confirm the filename by pressing enter. To exit nano, type control-X.
Add whatever you want to this HTML file, but you might start with a simple bit of text below the <h1> heading:
<p>This web site was created in CS101!</p>After saving the file, reload it in your browser and you should see the change.
The main difference between this and what we did for assignment 6 is that your page is hosted on a real server on the Internet that anyone in the world can access. (Until I shut it down two days from now… if you want to continue, reserve your own server on rackspace or another provider.)
File systems
In the last part of this lab, we will explore the Linux filesystem tools, and create and mount a new Linux filesystem.
Hard disks and other storage devices show up in the /dev directory we listed earlier. Let’s get a more detailed listing of the disks attached to this machine. The way this (virtual) server is configured, its disk names all begin with “xvd”, so this command will display them:
root@almond:~# ls -l /dev/xvd*
brw-rw---- 1 root disk 202,  0 Apr 30 18:17 /dev/xvda
brw-rw---- 1 root disk 202,  1 Apr 30 18:17 /dev/xvda1
brw-rw---- 1 root disk 202, 16 May  1 00:11 /dev/xvdb
brw-rw---- 1 root disk 202, 32 Apr 30 18:17 /dev/xvdc
brw-rw---- 1 root disk 202, 33 Apr 30 18:17 /dev/xvdc1
This is a long listing (-l), that shows more details about permissions, owners, and dates. The disk device names are all the way to the right. On other Linux systems, disk names might begin with sd or hd instead of xvd.
Excluding the numbers, there are three disks shown: xvda, xvdb, and xvdc. Further disks would be called xvdd, xvde and so on. The numbered devices correspond to partitions on those disks. It’s often helpful to split a disk into different segments that can fulfill different purposes, but on this machine, the a and c disks have just one partition.
A very helpful command to get more information about mounted (active) file systems is df (disk free space). I usually like to use the -h parameter, which makes the units easier to read (G for gigabytes, M for megabytes, etc.)
root@almond:~# df -h
Filesystem      Size  Used Avail Use% Mounted on
/dev/xvda1       20G  921M   18G   5% /
none            4.0K     0  4.0K   0% /sys/fs/cgroup
udev            237M  4.0K  237M   1% /dev
tmpfs            49M  184K   49M   1% /run
none            5.0M     0  5.0M   0% /run/lock
none            245M     0  245M   0% /run/shm
none            100M     0  100M   0% /run/user
Near the top of the output, you see a reference to /dev/xvda1. This is mounted as your main, “root” filesystem (/). That disk is 20G, and only 5% of it is being used right now.
A companion command to df is du (disk usage). It can give details about how much space is being consumed by individual folders on a disk. Here’s an sample command that compares usage of five different directories. (You must have at least one space between each directory – I exaggerated them below to make it clearer.)
root@almond:~# du -sh /etc /bin /lib /usr/bin /usr/share/doc
- How much space is consumed by
/etc? _____ - How much space is consumed by
/bin? _____ - How much space is consumed by
/lib? _____ - How much space is consumed by
/usr/bin? _____ - How much space is consumed by
/usr/share/doc? _____
So what about the second disk, xvdb? That one didn’t have a partition. It represents an additional storage volume that I attached to your server.
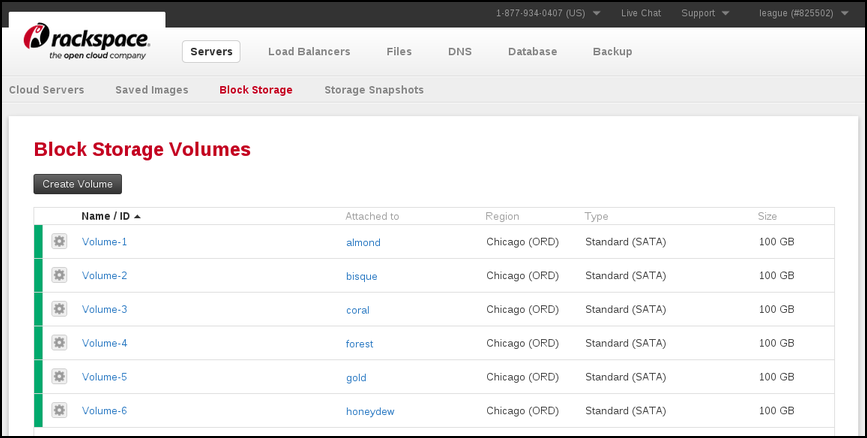
Block storage volumes
Right now, the extra storage is not ready to use. We need to create a disk label, a partition, format it with a Linux filesystem, and then mount it into our storage hierarchy. We’ll start with parted, the partition editor.
root@almond:~# parted /dev/xvdb
After you type the above command, you are in a new program that will give you its own prompts until we choose to quit. Within parted, the print command shows the current partition table.
GNU Parted 2.3
Using /dev/xvdb
Welcome to GNU Parted! Type 'help' to view a list of commands.
(parted) print
Error: /dev/xvdb: unrecognised disk label
The error indicates there is no partition table yet! (It’s also called a label.) Let’s create one. There are a couple of choices that are compatible with Linux, but the most common one is the old msdos table.
GNU Parted 2.3
Using /dev/xvdb
Welcome to GNU Parted! Type 'help' to view a list of commands.
(parted) mklabel msdos
(parted) print
Model: Xen Virtual Block Device (xvd)
Disk /dev/xvdb: 107GB
Sector size (logical/physical): 512B/512B
Partition Table: msdos

Number  Start  End  Size  Type  File system  Flags
Now it shows an empty partition table. Let’s create the first partition. We’ll just let it fill the disk, but you could use percentages here if you want to split it in half or thirds or something.
(parted) mkpart primary 0 100%
Warning: The resulting partition is not properly aligned for best performance.
Ignore/Cancel? i
(parted)
You can safely ignore the warning by typing i and enter.
(parted) print
Model: Xen Virtual Block Device (xvd)
Disk /dev/xvdb: 107GB
Sector size (logical/physical): 512B/512B
Partition Table: msdos

Number  Start  End    Size   Type     File system  Flags
 1      512B   107GB  107GB  primary
There’s your partition. You can see that the block device it’s on is a little over 100G. We’re done with parted now, so enter quit to return to your regular shell prompt.
(parted) quit
Information: You may need to update /etc/fstab.

root@almond:~#
After creating that partition, some magic has happened. If we check in the /dev (device) directory again, there is now an xvdb1!
root@almond:~# ls -l /dev/xvd*
brw-rw---- 1 root disk 202,  0 Apr 30 18:17 /dev/xvda
brw-rw---- 1 root disk 202,  1 Apr 30 18:17 /dev/xvda1
brw-rw---- 1 root disk 202, 16 May  1 00:57 /dev/xvdb
brw-rw---- 1 root disk 202, 17 May  1 00:53 /dev/xvdb1
brw-rw---- 1 root disk 202, 32 Apr 30 18:17 /dev/xvdc
brw-rw---- 1 root disk 202, 33 Apr 30 18:17 /dev/xvdc1
The next step is to format that partition as a Linux filesystem. The command for that is mkfs (make filesystem).
root@almond:~# mkfs /dev/xvdb1
mke2fs 1.42.5 (29-Jul-2012)
Filesystem label=
OS type: Linux
Block size=4096 (log=2)
Fragment size=4096 (log=2)
Stride=0 blocks, Stripe width=0 blocks
6553600 inodes, 26214399 blocks
1310719 blocks (5.00%) reserved for the super user
First data block=0
Maximum filesystem blocks=4294967296
800 block groups
32768 blocks per group, 32768 fragments per group
8192 inodes per group
Superblock backups stored on blocks:
        32768, 98304, 163840, 229376, 294912, 819200, 884736, 1605632, 2654208,
        4096000, 7962624, 11239424, 20480000, 23887872
[...more...]
This takes a little while, depending on the size of the volume. Once it has finished, you can mount it. To mount the device, we also need to specify where in the directory hierarchy it will live. There are lots of choices here: you can easily have directories like /etc or /usr or /home on completely different devices. But there’s also a few empty directories reserved for mounting various devices temporarily: /media and /mnt. We’ll use the latter.
root@almond:~# mount /dev/xvdb1 /mnt
root@almond:~#
Like most Unix commands, mount worked if it’s silent. No news is good news. Now investigate the contents of that folder:
root@almond:~# ls -l /mnt
total 16
drwx------ 2 root root 16384 May  1 00:58 lost+found
There’s only a folder called lost+found, which is where Linux filesystems store fragments of data that might become disconnected after disk damage or sudden power outages. (This is very rare.) You can also see information about the new disk in the output of df:
root@almond:~# df -h
Filesystem      Size  Used Avail Use% Mounted on
/dev/xvda1       20G  921M   18G   5% /
[...as before...]
/dev/xvdb1       99G   60M   94G   1% /mnt
We can see that only 1% of the new disk is being used. Most of that is for system-level bookkeeping – the disk is essentially empty right now.
Let’s copy some files to the new disk. We can make a backup copy of our configuration files, using the rsync command. This command is helpful for backups and other transfers because it avoids copying files that already exist at the destination.
root@almond:~# rsync -av /etc /mnt
[...lots of files being copied...]
sent 1477653 bytes  received 13704 bytes  596542.80 bytes/sec
total size is 1415872  speedup is 0.95
Let’s also copy the system documentation.
root@almond:~# rsync -av /usr/share/doc /mnt
Now you’ll see both those directories when you list the contents of /mnt:
root@almond:~# ls /mnt
doc  etc  lost+found
- What does
dfreport now, as the usage ofxvdb1? _____
Finally, let’s unmount the disk. This detaches it from our storage tree, and allows it to be swapped out of the server and possibly attached to a different one.
root@almond:~# umount /dev/xvdb1
Ensure that
xvdb1has disappeared from the output ofdf.Ensure that the
/mntdirectory is now empty. (What command did you type for that?) __________To bring back the volume, just reissue the original
mountcommand. Are all your files still there?