Ditching VirtualBox
We have encountered a number of problems with the VirtualBox machine, and getting assignments to submit to my server using Git:
Networking within the VM seems to be an issue, especially on the Mac. After leaving and rejoining a WiFi network, the VM may need to be restarted.
The local git repository on your VM gets corrupted easily, with messages like:
fatal: loose object bf17f6… (stored in .git/objects/bf/17f6…) is corruptRunning a VM smoothly requires a bit more memory than some older laptops have.
To alleviate these problems, here are instructions you can use to set up a compatible C++ development environment on your native platform, without VirtualBox. These are optional – if VirtualBox is working well enough for you, there is no need to do this.
On Windows
Generate an SSH key pair and email it to me (as in step 4a).
Download and install Orwell Dev-C++
After I reply that your new key is installed on the server, open Git GUI from your Start menu, then select Clone Existing Repository. For the Source Location, type
ssh://git@liucs.net:1010/cs102-NAME.gitwhere you replace
NAMEwith your account name – I’ll tell you what this is when you submit your key, but it’s probably your last name in lower-case, up to 8 characters.For the Target Directory, browse to someplace you’d like to store your work, such as Desktop or My Documents, but then add a
/cs102onto the end of it, manually. (Do not create that folder yourself.) Below is what it should look like: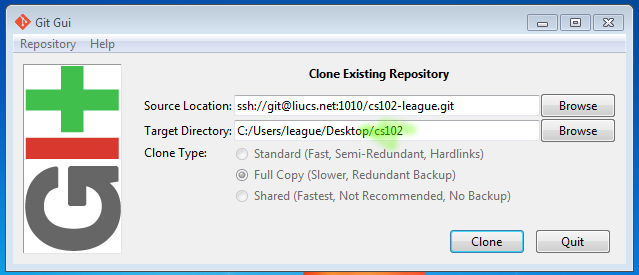
After the clone finishes, Git will open a window to view your repository (it says Current Branch: master at the top). You can close that window for now, but we’ll return to it later, when we sync to the server.
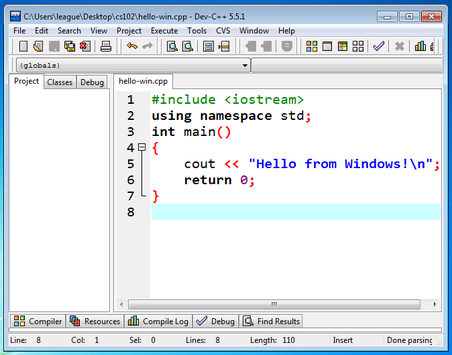
Open the Dev-C++ application, and select File » New » Source File from the menu. A tab will appear, called “Untitled1.” Choose File » Save As… and navigate to the
cs102folder you just cloned, in Desktop or My Documents or wherever you put it. Name your filehello-win.cppor similar.Then type or copy/paste one of the hello-world programs.
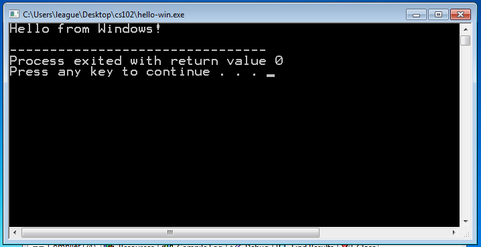
To run your program, select Execute » Compile & Run from the menu, or press F11. A terminal window will pop up, in which you can interact with your program.
Now we need to send your new program to the Git server. There are a few more steps than on my virtual machine. Open your
cs102repository in the Git GUI (or hit the Rescan button if you just left the window open from before).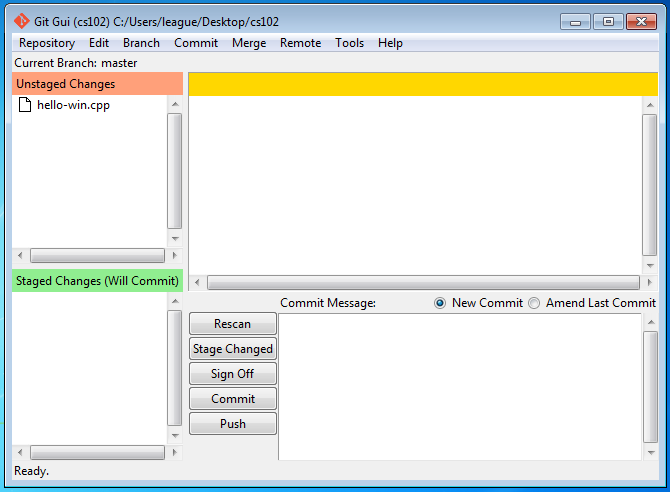
Any new or changed files should show up in the upper right, under Unstaged Changes.
Push the Stage Changed button to move them to the green staged section, below. Then you can type a message (such as the assignment number you’re submitting) in the Commit Message section, lower right, and push Commit. The staged change will disappear, and it should say “Created commit” in the status bar.
Next, select Remote » Fetch from » origin. If there were changes to fetch, it will report a line about
origin/master, something like this:From ssh://liucs.net:1010/cs102 261f309..3e533a7 master -> origin/masterIf it does report changes, you need to select Merge » Local Merge and then select
origin/masteras the Tracking Branch: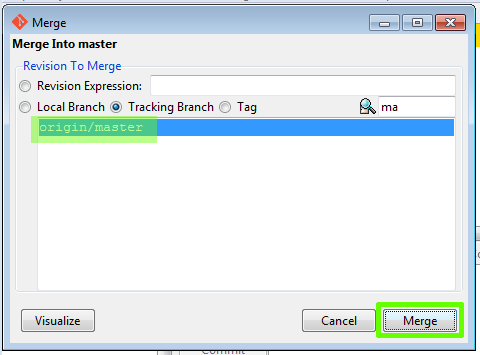
Finally, you can choose Remote » Push… from the menu. It will pop up a dialog, just to confirm you mean
masterandorigin. Confirm the push. If it succeeds, your code is submitted to the server.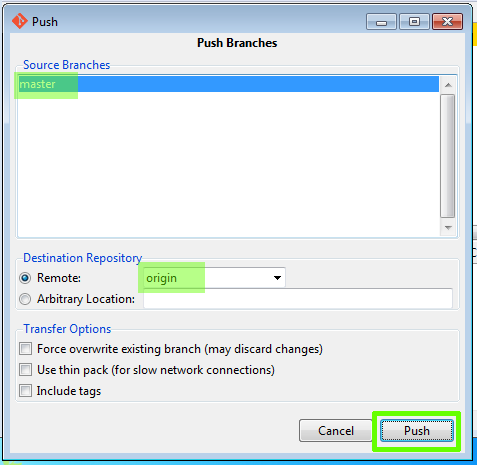
On Mac
Generate an SSH key pair and email it to me (as in step 4a).
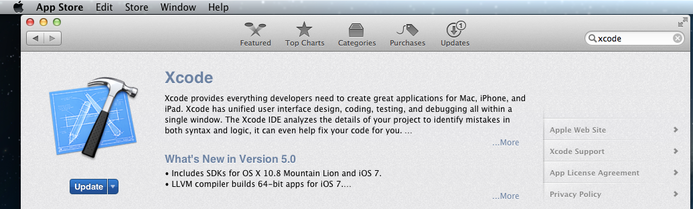
Install Xcode from the Mac App Store. You will probably need to register an account with Apple, if you have not done so already.
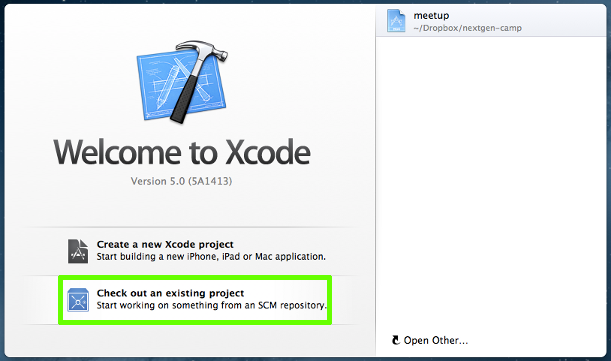
After I reply that your new key is installed on the server, open Xcode and select Check out an existing project from the welcome screen.
On the next screen, enter the repository location:
ssh://git@liucs.net:1010/cs102-NAME.gitwhere you replace
NAMEwith your account name – I’ll tell you what this is when you submit your key, but it’s probably your last name in lower-case, up to 8 characters. Hit Next.If it asks you which branch to check out,
masteris fine. Next, you select the directory where you want to check out the project. Change the name to justcs102(without your last name), and then place it in Desktop or Documents or somewhere easy to find.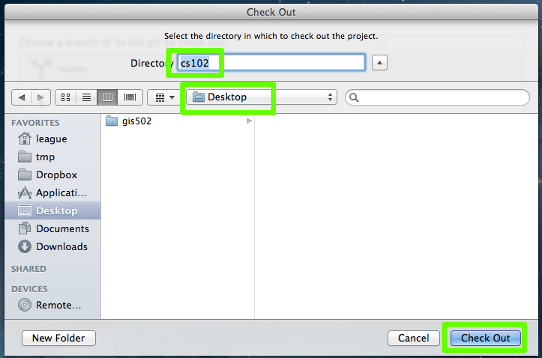

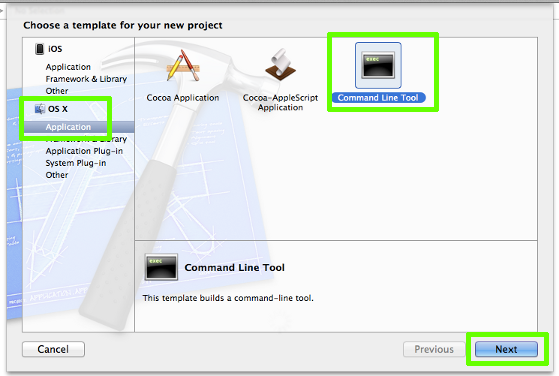
Once you have a successful check-out, Xcode may just quit. Open it again, and this time select Create a new Xcode project from the Welcome screen.
The template for your new project should be Command Line Tool, which is within OS X » Application.
On the next screen, you must enter a project name, and choose the type C++ from the drop-down. It may require a company identifier, you can just use
edu.liuornet.liucs.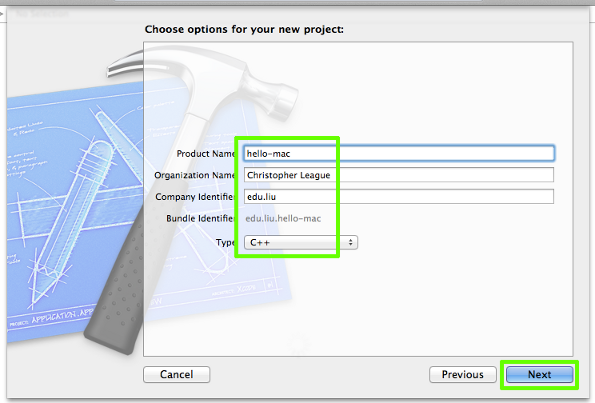
Next it asks where to store your project. You should navigate to the
cs102folder that you cloned from the server previously.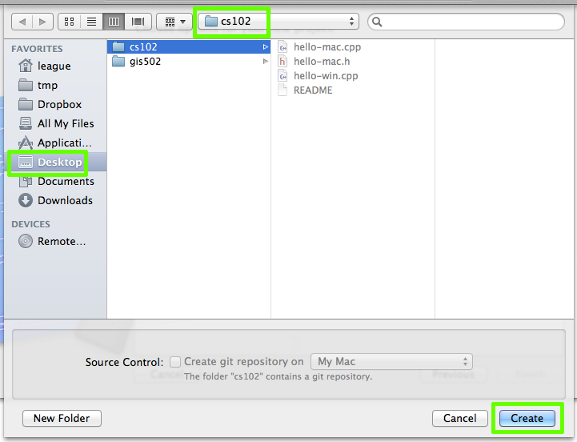
Now your project is created and open. There should be a file in the navigator on the left side called
main.cpp. Select that and you’ll see a “Hello world” type application. It looks slightly different than what we’ve been doing because they usestd::coutinstead ofusing namespace std;and there is some stuff between the parentheses ofint main(). But you can replace all that with any of the programs we have been developing, and they should work.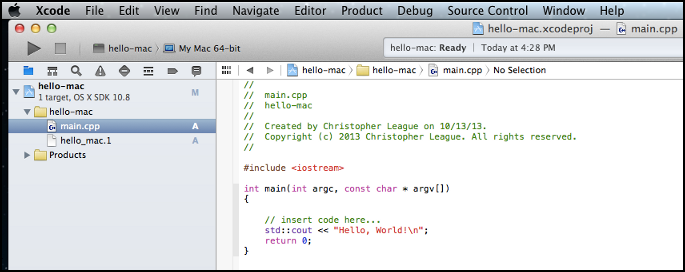
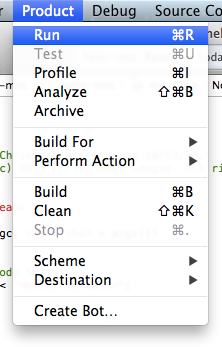
Select Product » Run from the menu, or press ⌘-R.
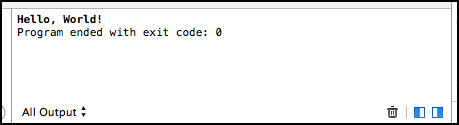
You’ll see the output of the program (and be able to interact with it, if it does input) in the lower right of your Xcode window.
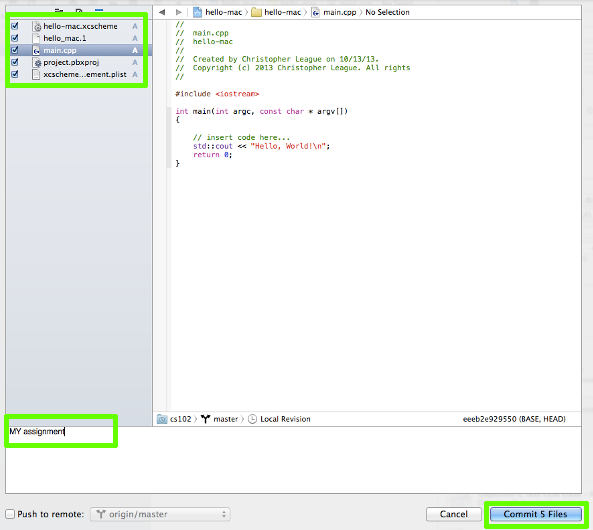
Okay, now you know how to create a project, edit your code, and run it. When you are ready to submit, here is the procedure.
Select Source Control » Commit… from the menu.
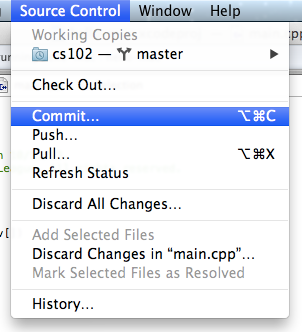
This is the commit screen. Make sure that your new and modified files are selected in the upper left. Then type a commit message (such as the assignment number you’re submitting) in the box across the bottom, and push Commit N Files.
After a successful commit, you should pull in any changes from the server using Source Control » Pull… Leave it as
origin/master.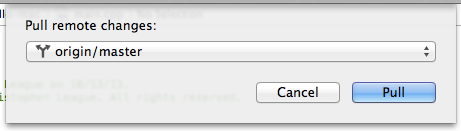
Finally, push to the server using Source Control » Push…
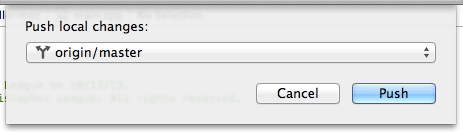
If the push succeeds, then your work is safely saved onto the server.