Project 1: HTML+CSS
3 February 2019 ![]()
For this assignment, you will design and implement a small static web site using hand-coded HTML and CSS.
Requirements
- Your site should have three separate HTML pages that are each
linked to all the others. The main (home) page should be named
index.html. - Use an external style sheet called
style.cssso that the style rules for all three pages are consistent. - Among the three pages, there should be at least four images.
- At least one page should use a multiple-column layout.
Tool suggestions
- Use Atom as your code editor. In the VM, it is accessible as ⚙ » Development » Atom.
- Once you have a
.htmlfile saved in Atom, you should try out Packages » Preview HTML » Enable Preview. - Helpful key shortcut: Ctrl-Alt-period will close the currently-open tag.
- Also try Edit » Lines » Auto Indent.
How to submit
If you are using the VM for both courses this semester (CS120 and CS164), you only need to do this first subsection once. Repeat starting at the subsequent section (Create gitlab project) for the other course.
Continue git setup
- In your VM, open ⚙ » Terminal Emulator and type the
following two commands, replacing the upper-case portions in
double quotes with your actual name and email address. (You
should use the same email address that is registered on
gitlab.liu.edu.)git config --global user.name "YOUR NAME" git config --global user.email "YOUR.ADDRESS@EXAMPLE.COM"
(If it says “git: command not found,” you need to update your VM configuration – just type
liucs-update.) - Next, generate an SSH key pair by typing
ssh-keygen. You’ll press enter for the defaults, including an empty passphrase. It should go something like the following, though the fingerprint and “random art” will be different, and the⏎symbol represents where you press enter:Generating public/private rsa key pair. Enter file in which to save the key (/home/student/.ssh/id_rsa): ⏎ Enter passphrase (empty for no passphrase): ⏎ Enter same passphrase again: ⏎ Your identification has been saved in /home/student/.ssh/id_rsa. Your public key has been saved in /home/student/.ssh/id_rsa.pub. The key fingerprint is: SHA256:WSZdJ850SVsi6WbOHyI8j2l4b3YA96HyWqXSnJx3AtA student@liucs The key's randomart image is: +---[RSA 2048]----+ | =o=..| | . *.=.+ | | . =.E . | | =..= . | | S. B.o.. | | =+**o | | ..OO+o..| | . =o=.oo | | o.=.. | +----[SHA256]-----+
- Type
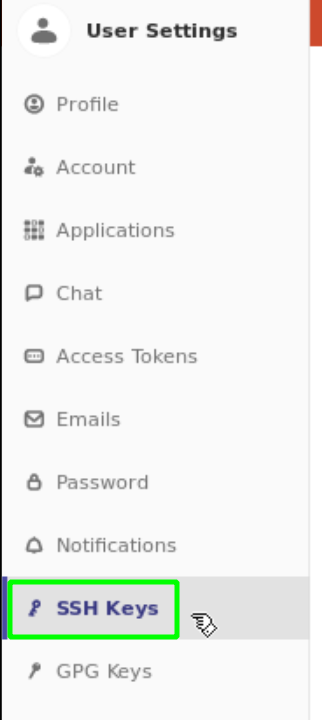
atom ~/.ssh/id_rsa.puband wait for Atom to pop up. It should show some text that begins withssh-rsa AAA.... Use Ctrl-A then Ctrl-C to copy the entire code onto the system clipboard. - Use ⚙ » Web Browser to log in to your account at
gitlab.liu.edu. Select Settings from the profile menu in the upper right, then SSH Keys from the left sidebar, as shown in the screenshots.
- Paste the
ssh-rsacode into the big box as indicated, then hit Add key. You don’t need to provide the Title.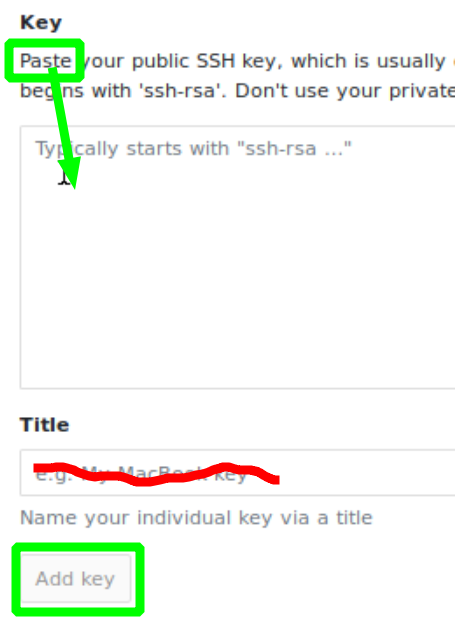
Create gitlab project
- Still on
gitlab.liu.edu, use the upper left menu to go back to your projects list. Click the green New Project button. - In the Project name box, enter “cs120”.
- The Project URL and slug should be fine as they are, and you don’t need a Project description. Keep the Visibility level set to Private.
- Select the checkbox to Initialize repository with a README.

- Hit Create project.
- On the page for your new project, look for Settings » Members in
the left sidebar. In the Search for members box, type
leagueand select the user named exactly@league, with my picture. Change the role permission drop-down to Developer and then click the green Add to project button. - Go back to the main project page (cs120 at the
top of the left sidebar), then find the
ssh://URL and use Copy to clipboard.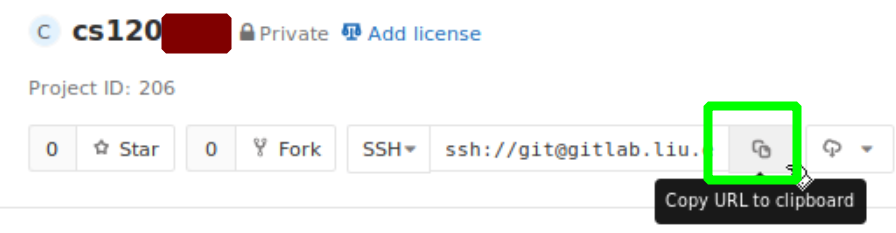
- Back in the terminal, change to your
Desktopdirectory, and then run the git command. You can paste the URL instead of typing it by right-clicking or using Shift-Ctrl-V:cd ~/Desktop git clone ssh://git@gitlab.liu.edu:4000/USERNAME/COURSE.git
The first time you connect from a new VM, it will probably print a fingerprint and ask whether to continue connecting — type out
yes.
Commit a change from VM
- Switch back to Atom, then use File » Open Folder and navigate to student » Desktop » cs120.
- Click
README.mdin the Project file tree to open it.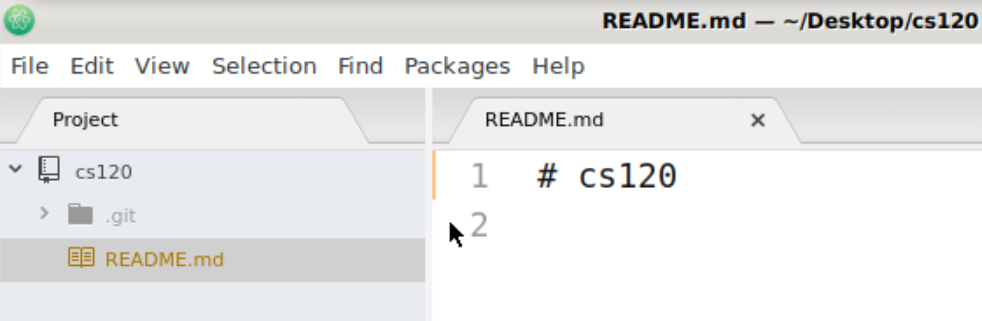
- Make a small change to the
README.mdfile, perhaps by typing your name into it. Save the change. - Select View » Toggle Git Tab or Ctrl-Shift-9.
- Hit Stage all in the upper right.
- Type
updated READMEinto the box labeled Commit message and then hit Commit to master. - The commit should appear in the history list in the lower right,
just above “Initial commit.” (They are in reverse chronological
order.)
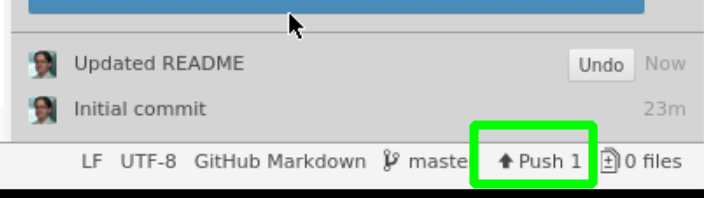
- Hit Push to upload your changes to the gitlab server.
Submit your project
- Now you are finally ready to submit your project file(s), and all future projects. (We’ll use the same GitLab project repository throughout the semester — don’t create additional projects unless I advise you to.)
- Use ⚙ » File Manager to move your project file(s) into Desktop » cs120.
- Go back to the Atom Git Tab. It should notice the new file(s) under Unstaged changes. Repeat the same commit and push steps as before. You can use “Submitting project 1” or similar as your commit message.
- Refresh your project page on
gitlab.liu.eduand you should see evidence of the submission.