due at 23:59 on
Initial user-interaction design
Create some more diagrams of the user-interaction design of our web service. The ones we did in class on 23 January are in the notes.
Setting up your tools
(A) Install VirtualBox 4
We will use virtual machine software for this course, both to implement the assignments and to run the resulting OS kernel. I have already configured a VM image with all the software we’ll need for this course.
Download my VM image (about 780 MiB) from
https://s3.amazonaws.com/liucs.net/Debian-Spring-12.ovaDownload VirtualBox for your host OS (Windows or Intel Mac) from
https://www.virtualbox.org/wiki/DownloadsInstall VirtualBox. If the installer gives you any trouble, try rebooting.
Run the VirtualBox application. You may just cancel the registration form.
(B) Configure and boot Debian Linux VM
From the File menu, select Import Appliance. Push the Choose button, navigate to your
Downloadsfolder, and select theDebian-Spring-12.ovafile that you downloaded.Click Next, then Finish. The import process can take some time. Once it has finished, you can delete the
.ovafile, and the VirtualBox installer.Now you should have a Debian Linux VM in the left panel of VirtualBox. Before you start it, select it and click the Settings button on the tool bar. In the System section, you may have to reduce the base memory of the virtual machine. It should be no more than 75% of the memory of the host machine. For example, if you have 2G RAM, set the VM base memory to 1024MB (1G). If you have only 1G RAM, set the VM base memory to just below 768M.
Apply the settings and start the Linux VM. You may have to dismiss a dialog about capturing the keyboard or mouse; these things should resolve themselves once the VM is running. You should see the Debian start-up screen on a black background, wait a few seconds and then it will proceed with booting.
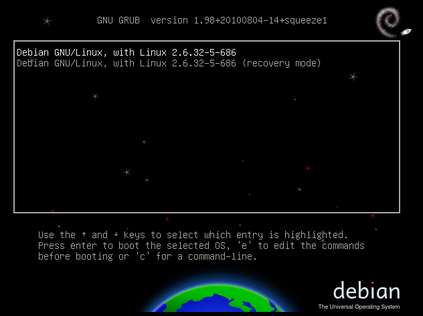
Debian boot screen

Debian boot process
Once the system finishes booting, the login screen should appear. Enter the following user credentials (passwords and user names are case-sensitive):
Username: liucs
Password: LIUcs!@
Debian login screen
After a successful login, you should see the Debian desktop. The buttons across the lower left (highlighted yellow in the image below) are an application menu, terminal, editor, file manager, and web browser. In this image, I have started the browser (which is a version of Google Chrome) and the terminal (command prompt).
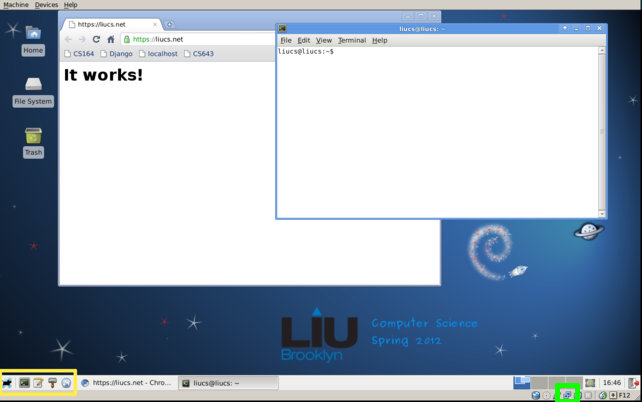
Debian desktop
If your screen has scroll bars or is too small, you can try to select Auto-resize Guest Display from the Machine menu at the top. Your Debian desktop should match the size of the VM window in which it appears.
Make sure that networking works by using the browser (within the VM, not on the host!) to do a Google search. If the network seems to be down (but is working on your physical host machine) then you may have to look for the VirtualBox networking setting (right-click on the two-screen icon in the lower right, highlighted green above) and change it from NAT to Bridged.
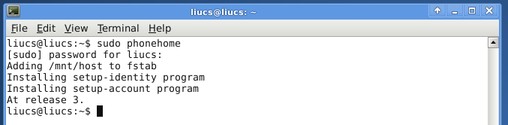
Next, we will update your system with some scripts and settings we need to continue. Open a terminal window and type the following. (The dollar sign represents the command-line prompt; don’t type that part!)
$ sudo phonehomeThe command
sudomeans “do the following as the super-user.” It will ask you for your the password for theliucsaccount (which isLIUcs!@as above). The password entry does not echo any characters as you type, but it is accepting input. Just press enter when you are done.The
phonehomecommand connects to my server to run a script that updates your machine’s configuration.It should look something like this:
Command-line example
Next, you will connect your VM to an account on the server. You should have received an activation code by email to your LIU address. Find that, and then type the command
setup-accountin the terminal. It will go through a process like this:$ setup-account This script will help you set up your VM and server accounts. You should have received an activation code at your LIU address. Enter activation code: 0123-4567-89ab-cdef ## (sample) Enter your full name: Christopher League Enter your email address (does not need to be LIU): christopher.league@liu.edu 1. Storing your SSH private key 2. Storing your identity 3. Writing git config 4. Writing SSH config Your account name is: leaguecPay attention to your account name; you’ll need it later.
If any errors occurred in this section, contact me ASAP, and do not move on to part C. Tell me exactly which step failed, and what happened, with exact error messages. You should learn how to take a screen capture on your system, so that you can capture all the details in long error messages. Telling me “it didn’t work” with no other details will not get the problem solved quickly!
(C) Connect to your source repository
On your Debian virtual machine, open up a terminal. We’ll now use
gitto check out the sources for your project. ReplaceYOURNAMEin the following with your account name (provided to you by thesetup-accountscript).$ git clone git@liucs.net:cs164-YOURNAME.git cs164This will create a folder
cs164within your home directory (calledliucs). You can investigate it in the file manager. It should have another folder calledbookswapwithin: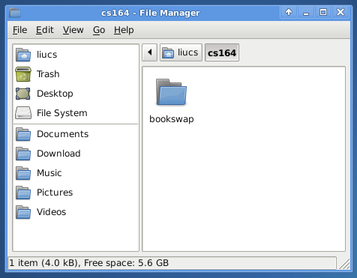
cs164 folder
Now we will try running the project with Django. Use the following command in the terminal to switch to the
bookswapfolder:$ cd ~/cs164/bookswapType the following command to run the Django web server.
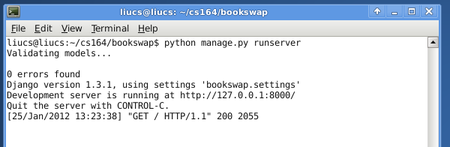
$ python manage.py runserverOpen up the web browser on your Debian VM and visit
http://localhost:8000/(there is already a bookmark for localhost). You should see the Django confirmation page, as below: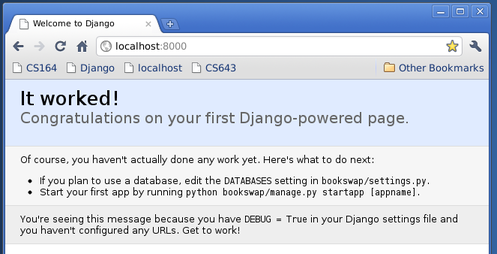
Django welcome page
Back in your terminal window, you should see a log of accesses to the page. You can press Control-C in the terminal window to stop the server.
Django access log
Finally, just so you can see how you would submit a change to the source code, open up your
gedittext editor application – it’s the icon between the terminal and the file manager, or on the menu under Accessories. In gedit, use File → Open to navigate through the folderscs164/bookswapand openurls.py. Uncomment the two lines at the top (by removing the pound signs), as indicated below:from django.conf.urls.defaults import patterns, include, url # Uncomment the next two lines to enable the admin: from django.contrib import admin admin.autodiscover()Save this file and switch back to your terminal. The
git statuscommand should report that this file was modified:$ git status # On branch master # Changes not staged for commit: # (use "git add <file>..." to update what will be committed) # (use "git checkout -- <file>..." to discard changes in working directory) # # modified: bookswap/urls.py # no changes added to commit (use "git add" and/or "git commit -a")Once you are happy with your modifications (you may want to do
runserveragain to be sure you didn’t add a syntax error), you must submit your code using the terminal, as follows. Put your commit message between single quotes.$ git commit -am 'my first modification of a django project' $ git pushThe first command stores your commit in your own working copy, so you can go back to that snapshot at any time. The second command sends your commit up to the server, where I can access it.
All done for now!
comments powered by Disqus
©2012 Christopher League · some rights reserved · CC by-sa