due at 23:59 on
This milestone will address user accounts and authentication.
Again, the following commands will update your repository to the latest code that I may have added:
liucs:~$ cd cs164/bookswap
liucs:~/cs164/bookswap$ git pull
Before continuing, make sure you are caught up on Milestone 5.
If you got stuck on M5:
Here is how you can abandon your changes and continue your project using mine. Do this only if you feel you need it to make progress, or if I advise you to! After finishing this sequence of commands, send me an email to let me know how it went (or report anything that looks like an error).
- It’s fine if there are no unsaved changes in step 1.
- That’s a Capital
-Xin step 2.
## Use these commands ONLY if you are stuck on M5
liucs:~/cs164/bookswap$ git commit -am "unsaved changes"
liucs:~/cs164/bookswap$ git merge -X theirs origin/solution
liucs:~/cs164/bookswap$ git push
liucs:~/cs164/bookswap$ rm -f dbfile
liucs:~/cs164/bookswap$ python manage.py syncdb --noinput
liucs:~/cs164/bookswap$ python manage.py loaddata sample
After adding the sample data, your admin interface username is admin and the password is admin.
(A) Log in, log out
Let’s start with logging out. That’s easier. You can always force a log in of an administrative user by accessing the admin pages at http://localhost:8000/admin/ and then manually reloading the home page http://localhost:8000/
Add a logout entry to urls.py:
url(r'^logout/', 'app.views.logout_view', name='logout'),In your app/views.py, you will need to import some helper functions from Django:
from django.contrib.auth import authenticate, login, logoutFor the logout_view, you’ll need to call the helper function logout (it requires the request object as a parameter), and then you can redirect the user back to the home page.
def logout_view(request):
    logout(request)
    return HttpResponseRedirect(reverse('home'))
Note: if you don’t have it already, the reverse function is imported from django.core.urlresolvers.
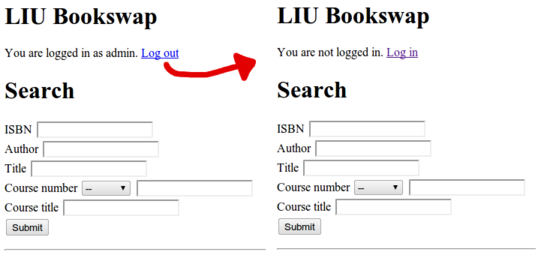
Test this by placing a log out link somewhere in templates/base.html:
<a href="{% url logout %}">Log out</a>You should be able to click on it and be returned the home page logged out:
Now we need the log-in feature to work. Replace the log in link in templates/base.html with this simple email/password form:
  <form method="POST" action="{% url login %}">
    You are not logged in.
    {% csrf_token %}
    Email: <input type="text" name="email" size="14" />
    Password: <input type="password" name="password" size="10" />
    <input type="submit" value="Log in" />
  </form>
Because all forms should have a cross-site request forgery token, you will need to update all your views to include a context_instance parameter, like this:
    return render_to_response('blah.html', {'arg1': arg1, ...},
                              context_instance=RequestContext(request))
Your job now is to write the login_view function. Here are the steps:
Look up the
Userobject by checking that theemailfield matchesrequest.POST['email'].Check that the user exists and is active. If not, for now you can return a direct
HttpResponsewith an error message.Call
authenticateas follows:user = authenticate(username=user.username, password=request.POST['password'])authenticatewill return a new user object, or elseNoneif authentication failed. You can check for the new user object in a conditional just asif user:If authentication succeeded, call
loginwith the parametersrequestand the newuserobject.Finally, redirect to the home page.
Your login process should look something like this:
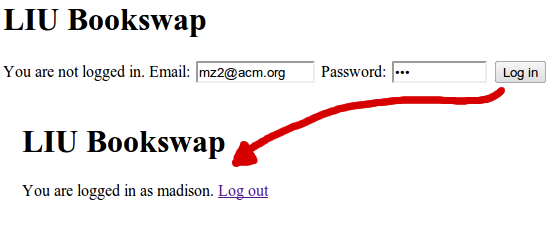
It’s okay for now if the error messages are a little awkward when the user is not found or the password does not match. Just do the best you can.
(B) Change password
Now we’ll work on allowing a logged-in user to change his/her own password. (This is not the same as a password reset for a user who forgot his/her password.)
Let’s start by connecting the “You are logged in as Chris” message on every page to the profile page for that user. Where should this go?
      <p>You are logged in as
        <a href="{% url user user.id %}">{{user}}</a>.
Now we can click on our own username to get to our user profile page. On that page, if we’re looking at the profile of the currently logged in user, add a link to a change-password page:
  {% if profile == user %}
  <p><a href="{% url pwchange %}">Change password</a>
  </p>
  {% endif %}
It’s up to you to create an entry in urls.py for pwchange. The view will have the normal structure for form-processing:
def pwchange(request):
    if request.method == 'POST':
        form = ChangePasswordForm(request.POST)
        if form.is_valid():
            request.user.set_password(form.cleaned_data['password1'])
            request.user.save()
            return HttpResponse('Your password has been reset.')
    else:
        form = ChangePasswordForm()
    return render_to_response('pwchange.html',
                              {'form': form, 'user': request.user},
                              context_instance=RequestContext(request))
Create the template pwchange.html to display the form, and create the ChangePasswordForm class in app/forms.py.
There are a couple of tricks you need for the ChangePasswordForm. The first is that we’re using character fields for the passwords, but we want to make sure our typing is obscured by the dots or stars as in a normal password entry. That’s the purpose of the widget= below:
class ChangePasswordForm(forms.Form):
    password1 = forms.CharField(widget=forms.PasswordInput)
The second trick is that we want the user to enter the password twice, so we can check for a mismatch. If the two entries are not equal, then we must issue a validation error instead of changing the password. Define a clean method in the form, like this:
class ChangePasswordForm(forms.Form):
    # Field definitions go here

    def clean(self):
        # TODO: check self.cleaned_data['fieldname'] for any field
        # In case of error, do:
        raise forms.ValidationError("Error message here.")
        # In the end, return:
        return self.cleaned_data
You should test that your form rejects mismatched passwords:
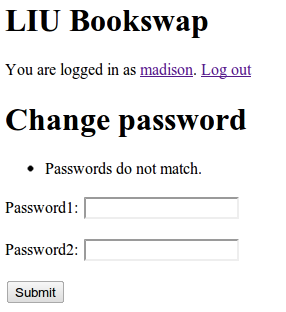
You should also test that, once it accepts your new password and you log out, you can use the new password to log in.
(C) User profile
The built-in User class from django.contrib.auth.models contains the following fields:
usernamefirst_namelast_nameemail
If we need to store additional information, such as phone numbers, then we need to create a separate model class. This is sometimes called a “user profile” class. It will have a one-to-one relationship with the built-in User. In app/models.py:
class UserProfile(models.Model):
    user = models.OneToOneField(User)
    phone = models.CharField(max_length='20', blank=True, null=True)
    other = models.TextField(blank=True, null=True)
All of its fields should be optional. Because we don’t have UserProfile objects for users which exist already, this will make it easier to create default ones on the fly. Don’t forget to register it with the admin interface:
admin.site.register(UserProfile)Also add a __unicode__ method to override the generic “UserProfile object” output with something more useful:
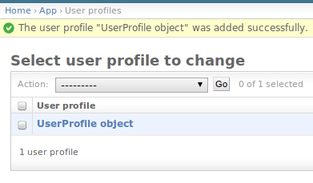
Next, it’s helpful to have a little function that will supply a default UserProfile in the case that a user doesn’t have one yet. Normally, thanks to the one-to-one field, we can access the profile via u.userprofile for any user u, but this fails if the UserProfile does not exist. Here’s the helper function, in app/models.py:
def profileOf(user):
    try:
        return user.userprofile
    except UserProfile.DoesNotExist:
        p = UserProfile(user=user) # Create new one
        p.save()
        return p
You can now force the creation of user profiles for all the users in your sample data at the python shell:
liucs:~/cs164/bookswap$ python manage.py shell
In [1]: from django.contrib.auth.models import User
In [2]: from app.models import *
In [3]: profileOf(User.objects.all()[0])
Out[3]: <UserProfile: admin profile>
In [4]: [profileOf(u) for u in User.objects.all()]
Out[4]:
[<UserProfile: admin profile>,
 <UserProfile: bill profile>,
 <UserProfile: madison profile>,
 <UserProfile: jack profile>,
 <UserProfile: james profile>,
 <UserProfile: william profile>,
 <UserProfile: milton profile>]
Maybe at this point you want to go into the admin interface and provide some sample contact info for these users. Then do another dumpdata to store your new details in sample.json. The instructions for this are in Milestone 3 (you’ll have to add app.UserProfile as an additional model in the dumpdata command).
One more step: we want to display the new contact info on the user’s profile page. This means the userprofile view will pass in the UserProfile object instead of the User object.
def userprofile(request, id):
u = User.objects.get(id=id)
p = profileOf(u)
return render_to_response('user.html',
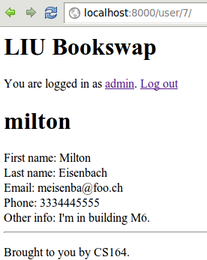
{'profile': p, 'user': request.user})You’ll have to adjust the variable substitutions in user.html accordingly – fields like first_name will now be accessed as {{profile.user.first_name}}. Here is a completed user profile page:
(D) Edit user profile
TBD
(E) Send email to user
For some of the remaining user account functionality, we’ll need to send activation links to users by email. Our virtual machines are not fully-qualified domains on the Internet, and are thus not capable of sending email directly. For the purposes of testing and development, we’ll simulate having a real mail server using a Python command-line tool. Here is how to set it up.
In settings.py, add the following two definitions. The location doesn’t matter, as long as they don’t interfere with any other definitions:
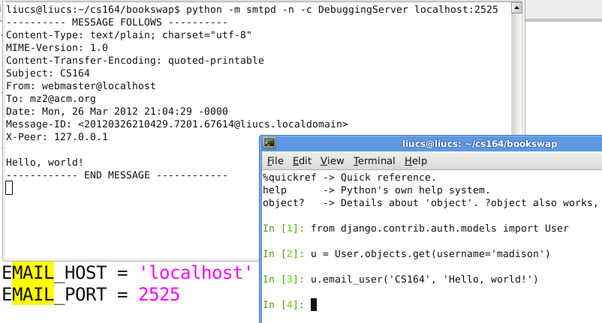
EMAIL_HOST = 'localhost'
EMAIL_PORT = 2525
Now, in a brand new terminal window and issue the following python command:
liucs:~/$ python -m smtpd -n -c DebuggingServer localhost:2525
It shouldn’t output anything; it will just appear to pause. That’s fine. It’s waiting for some software to contact it to try to send email, then it will dump out the contents of that email in the terminal.
Now, in a different terminal window, we can access a python shell, pick out a user who we know has an email address (it doesn’t have to be valid), and send them email:
liucs:~/cs164/bookswap$ python manage.py shell
Python 2.6.6 (r266:84292, Dec 27 2010, 00:02:40)
In [1]: from django.contrib.auth.models import User
In [2]: u = User.objects.get(username='madison')
In [3]: u.email_user('CS164', 'Hello, world!')
In [4]: quit()
Do you really want to exit ([y]/n)?
liucs:~/cs164/bookswap$ git status
The email_user method takes two parameters: the subject, and the body of the email. You should see a MESSAGE FOLLOWS block in your smtpd terminal, as illustrated below:
(F) Reset password
Here are the steps to enable a password-reset mechanism:
In
templates/base.html, add a link for “Forgot password” beside or below the login form. I used the short name{% url pwreset %}Add a corresponding entry for
app.views.pwresettourls.py.Add an
EmailFormtoapp/forms.py. The field type you’ll use isforms.EmailField(), because this automatically ensures that the user enters a valid email address. We collect only the email address at this point; we’ll ask for the new password after they click the link in the email we send.Add the
pwresetview function toapp/views.py. It should have a standard form-processing structure usingEmailForm. If the form is valid, for now, justreturn HttpResponse('send email'), and test that yourForgotPasswordlink successfully works to this point: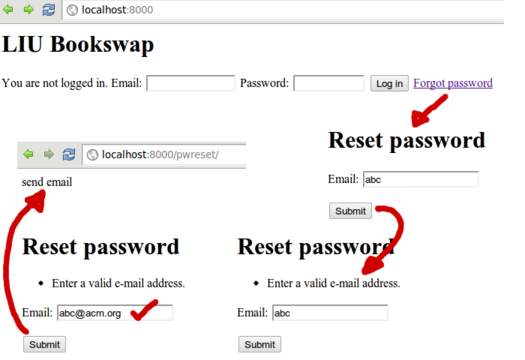
Now, to actually send an activation link through email. We will need to generate a random code and store it in a database along with the user we’re sending it to. Add this model to
app/models.py:class Activation(models.Model): code = models.CharField(max_length=20) user = models.ForeignKey(User) kind = models.CharField(max_length=1) created = models.DateTimeField(auto_now_add=True)We’ll use the
kindfield to indicate what type of activation this represents. The only two we’ll probably use in the short term is to reset a password (R) and to activate a new account (A).The
auto_now_addoption of theDateTimeFieldmeans that this field will automatically be set to the current date and time whenever we first create an activation object.Give your model a
__unicode__method, so we can see something reasonable in the administrative interface and in the shell: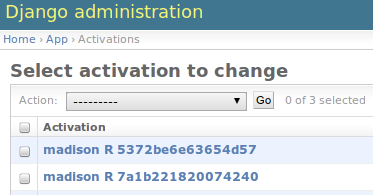
(You also need
admin.site.register(Activation)for the model to appear in the interface.)Back in the
pwresetview, replace the temporaryHttpResponsewith some code to look up the user by email address, create a random code, save anActivationobject, and send the code to the user by email. Here’s an illustration of one way to generate a random code, using theuuidmodule.liucs:~/cs164/bookswap$ python manage.py shell Python 2.6.6 (r266:84292, Dec 27 2010, 00:02:40) In [1]: import uuid In [2]: uuid.uuid4() Out[2]: UUID('8e0fae75-a258-4a8d-915c-80487719711f') In [3]: uuid.uuid4().hex Out[3]: '8e1dfd4206e74d0db49e9dab074ab8ff' In [4]: len(uuid.uuid4().hex) Out[4]: 32 In [5]: uuid.uuid4().hex[:12] Out[5]: '01a4b2694936' In [6]: uuid.uuid4().hex[:18] Out[6]: 'f4010668f6f84ce2b7' In [7]: quit() Do you really want to exit ([y]/n)? liucs:~/cs164/bookswap$
uuid4is a completely random 128-bit (32 hex digits) universally-unique identifier. You can use all 32 or select a shorter prefix.Finally, we need a view function
activatethat will handle a user clicking on the activation link in the email. Add an entry like this inurls.py:url(r'^activate/(w+)/', 'app.views.activate', name='activate'),The view function will start like this:
def activate(request, code):
    a = Activation.objects.get(code=code)
    # TODO display/process a ChangePasswordForm
You can reuse the
ChangePasswordFormfrom part (B). The only difference is that the user we’re changing isa.user(the one stored in the activation object) rather thanrequest.user(the one currently logged in).
(G) User registration
TBD
comments powered by Disqus
©2012 Christopher League · some rights reserved · CC by-sa