due at 23:59 on
To get started with this milestone, first execute the following commands in the terminal. They will change to your working directory, and then retrieve the latest changes I have made from the server.
$ cd ~/cs164
$ git pull
You should see that cs164/bookswap now has a folder called liu.
(A) Enable administrative interface
Last time, we began to enable the administrative interface by having you uncomment the two lines from urls.py:
# Uncomment the next two lines to enable the admin:
from django.contrib import admin
admin.autodiscover()
But there is a little more work to do. Also uncomment the entry about the admin/ URL, around line 16:
    # Uncomment the next line to enable the admin:
    url(r'^admin/', include(admin.site.urls)),
Next, open up settings.py, and search for the INSTALLED_APPS section. We’re going to do two things here: uncomment django.contrib.admin, and add a new entry for the liu app. In the end, it should look like this:
INSTALLED_APPS = (
    'django.contrib.auth',
    'django.contrib.contenttypes',
    'django.contrib.sessions',
    'django.contrib.sites',
    'django.contrib.messages',
    'django.contrib.staticfiles',
    # Uncomment the next line to enable the admin:
    'django.contrib.admin',
    # Uncomment the next line to enable admin documentation:
    # 'django.contrib.admindocs',
    'liu',
)
Notice that we left a comma at the end after 'liu'. Many languages treat commas as separators and make it a syntax error to insert an extra one after the last element of a list. In Python, you can put the extra comma if you wish. It’s really convenient because then when we add new entries later on, we don’t have to worry about updating commas on previous lines.
Next, we need to enable the database by setting up the DB back end. Django supports PostgreSQL, MySQL, Oracle, and SQLite. It’s really convenient to use SQLite as we’re starting out, because there’s no other setup to do. Later on we can pretty easily switch to a different DB if we need to.
Look for the DATABASES section in settings.py and change the ENGINE and NAME entries as follows:
DATABASES = {
    'default': {
        'ENGINE': 'django.db.backends.sqlite3',
        'NAME': 'dbfile', # Path to database file if using sqlite3.
        'USER': '',       # Not used with sqlite3.
        'PASSWORD': '',   # Not used with sqlite3.
        'HOST': '',       # Not used with sqlite3.
        'PORT': '',       # Not used with sqlite3.
    }
}
If you did all of that correctly, we should be able to sync the current models to the database, and see the results in the administrative interface. Run the following commands in your terminal. The first is just to ensure that we’re in the top-level directory of the bookswap project:
$ cd ~/cs164/bookswap
$ python manage.py syncdb
The syncdb command will create a bunch of tables in a file called dbfile. It will also ask you to set up an administrative super user. Enter a simple password for now (I use ‘abc’), because during development we’ll have to recreate this account many times and log in repeatedly. Here’s roughly what the output should be like:
Creating tables ...
Creating table auth_permission
Creating table auth_group_permissions
Creating table auth_group
Creating table auth_user_user_permissions
Creating table auth_user_groups
Creating table auth_user
Creating table auth_message
Creating table django_content_type
Creating table django_session
Creating table django_site
Creating table django_admin_log
Creating table liu_course

You just installed Django's auth system, which means
  you don't have any superusers defined.
Would you like to create one now? (yes/no): y
Please enter either "yes" or "no": yes
Username (Leave blank to use 'league'):
E-mail address: league@acm.org
Password:
Password (again):
Superuser created successfully.
Installing custom SQL ...
Installing indexes ...
Installed 1936 object(s) from 1 fixture(s)
The 1936 objects it mentions are a set of initial data I am providing you, which are the courses available on the Brooklyn Campus. We’ll be able to browse them in a moment.
In your terminal (or perhaps in a different one, because it’s convenient to leave this running for a while), execute the Django runserver command as follows (again, you have to be in the cs164/bookswap directory):
python manage.py runserverNow that you have changed urls.py visiting http://localhost:8000/ will give you a “Page not found (404)” error. This is because we don’t have an entry in urlpatterns for the home page yet.
However, visiting http://localhost:8000/admin/ should show you a login box for the administrative interface. Enter the super-user’s details that you set up during syncdb.
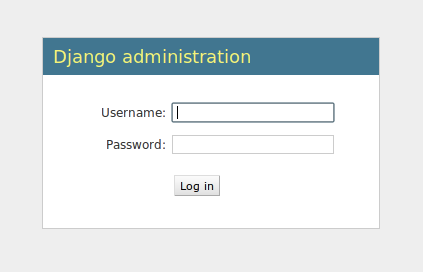
Django login
Note: If you ever forget your Django super-user’s password, or need to create a new admin account, you can use one of the following:
$ python manage.py changepassword
$ python manage.py createsuperuser
Once you log in, you will see the “Site administration” page with all your models:
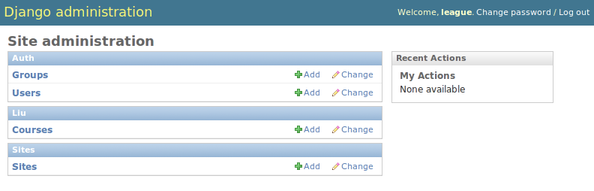
Django site administration
Click on Courses under the Liu heading. You will see a list of 100 course numbers and titles. The list is paged, so you can browse through all 1,936 courses. They may not be in any particular order; we’ll resolve that later.
You may want to commit your changes so far, before moving on to the next section:
$ git commit -am "Changes to enable DB and admin interface"
$ git push
(B) Develop a model for books
We discussed in class about creating a model for Books, and that it will likely be in a many-to-many relationship with the Courses. There are now two sub-directories underneath bookswap: liu and app. You’ll do most of your new work in app/models.py, but look at liu/models.py as an example and guidance. Here are the steps to get started.
Back in settings.py we’ll have to update INSTALLED_APPS again, by adding an entry for 'app':
INSTALLED_APPS = (
    'django.contrib.auth',
    'django.contrib.contenttypes',
    'django.contrib.sessions',
    'django.contrib.sites',
    'django.contrib.messages',
    'django.contrib.staticfiles',
    # Uncomment the next line to enable the admin:
    'django.contrib.admin',
    # Uncomment the next line to enable admin documentation:
    # 'django.contrib.admindocs',
    'liu',
    'app',
)
Next, open up app/models.py. It should currently be a mostly-empty skeleton ready for you to add your own models:
from django.db import models

# Create your models here.
You’ll want to add some of the elements from liu/models.py, such as the imports of the admin interface. You’ll also need to import the Course model itself from the liu module:
from django.contrib import admin
from liu.models import Course
Now you are ready to develop your own model. Here’s the skeleton that I provided in class:
class Book(models.Model):
    isbn = models.CharField(max_length='20')
    course = models.ManyToManyField(Course)

admin.site.register(Book)
Once you have added this model, you need to run syncdb again, to have it update the database.
$ python manage.py syncdbIf you still have runserver going (perhaps you can open two terminals: one for commands like syncdb, and one to just constantly do runserver), you can visit http://localhost:8000/admin/ to see Book in the model. Try adding a couple books (even though for now, you only have an ISBN).
As you add more fields, unfortunately, syncdb isn’t smart enough to update the database appropriately. It’s not surprising, because successfully updating a table that may already have records in it is a very hard problem. So here’s the work-around:
When you change or add new fields to the database, we’re going to delete the existing database file and then run syncdb again to create a fresh one:
$ rm dbfile
$ python manage.py syncdb
Yes, this will cause us to lose all our test data, and you’ll have to go through the “create superuser” process again. (The 1,936 courses will be reinstated, and later I’ll show you how to automatically reinstall your own test data each time.)
Obviously this method is not acceptable once we’re in production. If you need to change a field or add some new ones after initial deployment, there are ways to do that, but it’s tricky and not worth the trouble at this stage.
(C) Enhance the administrative interfaces
As you add books in the admin interface, you’ll notice that they just appear as “Book object,” or something similar. Let’s fix that. Your Book model needs a method called __unicode__. Look at the example from liu/models.py:
    def __unicode__(self):
        return '%s %s %s' % (self.prefix, self.number, self.title)
This uses the percent-codes to substitute in string values from the model. You can adapt it for books by including maybe the title and ISBN. (Don’t try to include all the fields, it would take up too much space.)
Test your __unicode__ method by reloading the admin interface, and all those “Book object” listings will update to use your method. (Or, it could report a syntax or other kind of error if you made a mistake in implementing the method.)
Next, let’s try enhancing the admin interface a little further. We can ask it to provide additional data in separate columns, to have filters, search fields, etc. After your class Book, just add an additional class derived from ModelAdmin, like this:
class BookAdmin(admin.ModelAdmin):
    list_display = ['isbn', 'title', 'authors']
    search_fields = ['title', 'authors', 'publisher', 'isbn']
Those lists contain field names from your Book model, but they must be in quotes. Now all you have to do is modify the admin.site.register command to pass in these administrative settings:
admin.site.register(Book, BookAdmin)Try these out in the admin interface. It should show additional columns and a search box when you are looking at the Books list. Adjust to your taste.
Once you have the hang of the ModelAdmin settings, you can try to enhance the Course model in liu/models.py similarly. Make course titles searchable, for example. You can also set the default search ordering using a Meta sub-class, like this:
class Course(models.Model):
    prefix = models.CharField(max_length='20')
    number = models.CharField(max_length='20')
    title = models.CharField(max_length='80')

    class Meta:
        ordering = ['prefix', 'number']

    def __unicode__(self):
        return '%s %s %s' % (self.prefix, self.number, self.title)
Pay close attention to the indentation: class Meta and def __unicode__ are both part of the class Course, but ordering is a part of the “inner” class Meta. Now, courses will appear in order by default:
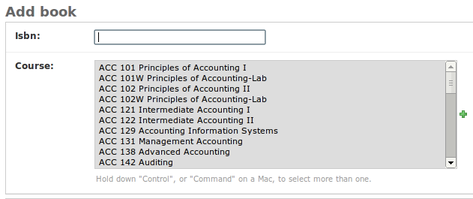
Course ordering when adding book
(D) Develop a model for listings
Finally, you should develop models for the buy and sell requests. When a user wants to buy a book, or sell a book, we represent that by a record in a database table that points to both the Book and the User as a foreign key.
Django comes with a built-in User class, which you can import as follows:
from django.contrib.auth.models import UserThen, you’ll want your model to use a couple of ForeignKey fields, which look like the following. The lower-case user is the name of the field (within a model class), and the capitalized User is the name of the model imported from django.contrib.
user = models.ForeignKey(User)Write __unicode__ methods for your additional models, register them with the admin interface, and test them by adding some records there.
To submit your work, do the two-step git commit and push commands:
$ git commit -am "my book model"
$ git push
By the way, these commit messages (the part in quotes) are completely up to you, feel free to say whatever you want about the status of your project.
comments powered by Disqus
©2012 Christopher League · some rights reserved · CC by-sa