Drawables and ImageView
Drawable basics
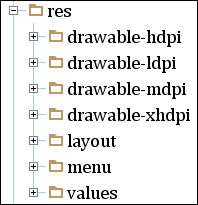
You can add images (jpg or png files) into your Android app using a “drawable” resource. In the project explorer, look at the sub-folders of the resource folder res at the top level:
The drawable- folders have the following suffixes:
ldpi– low-density screens, ~120 dots per inch (0.75×)mdpi– medium-density screens, ~160 dpi (baseline)hdpi– high-density screens, ~240 dpi (1.5×)xhdpi– extra-high-density screens, ~320 dpi (2.0×)
This is part of Android’s flexible system for supporting multiple screen sizes, shapes, orientations, and densities (more here).
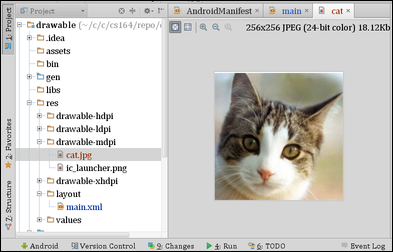
To get started, save a small image into the drawable-mdpi folder. The filename must contain only valid identifier characters (no spaces or hyphens, and just the one dot before the extension). You can right-click on this cat image to use that, or find your own example.

Here is the image, in the correct folder, as seen from IntelliJ.
In your activity’s layout, you can drag the ImageView widget onto the screen. It has a property called src. Using the ... button, you should be able to select the new image under Drawable, and hit OK. The src attribute will then contain the text @drawable/cat.

The ImageView you dragged onto the screen will contain the image.
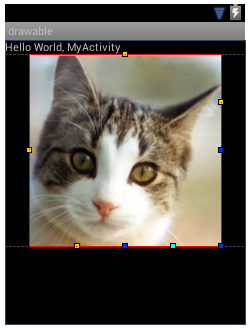
Try running it in the emulator, to ensure the image loads correctly.
Sub-classing ImageView
Sometimes it’s helpful to provide your own subclass of ImageView, or other widgets. You would normally do this if you’d like to keep some piece of state encapsulated with the widget, and then handle clicks or other events that update that state.
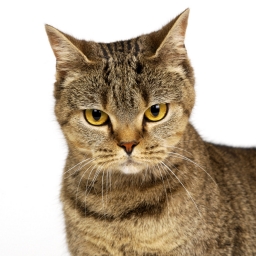
For example, let’s imagine clicking on the cat to make it angry. We can gather two additional cat images, and drop them into drawable-mdpi.
surly_cat.jpg

lion.jpg
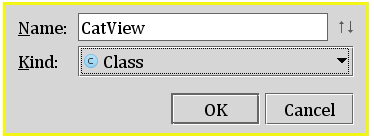
Then, in the project explorer, right-click on your package name in src (com.example.hello or whatever), and choose New » Java Class.
/** A cat that gets angrier as you click it. */
public class CatView extends ImageView implements View.OnClickListener {

    /** Anger level of cat. Valid values are 0 up to 2, inclusive. */
    private int anger = 0;

    /** We need this two-parameter constructor to add a CatView
     * in the XML layout.
     */
    public CatView(Context context, AttributeSet attrs) {
        super(context, attrs);
        setImage();
        setOnClickListener(this);
    }

    /** After updating anger, call setImage to choose the correct
     * drawable from the resources.
     */
    private void setImage() {
        switch(anger) {
            case 0: setImageResource(R.drawable.cat); break;
            case 1: setImageResource(R.drawable.surly_cat); break;
            case 2: setImageResource(R.drawable.lion); break;
        }
    }

    /** The click handler increments the anger, and updates the image.
     */
    @Override
    public void onClick(View v) {
        anger++;
        if(anger > 2) {
            anger = 0;
        }
        setImage();
    }
}
Now, we need to tell the layout to use our custom CatView class, rather than the default ImageView. Remove the ImageView from the layout by right-clicking, then selecting Delete. Then find the CustomView entry on the Palette, under the “Custom” heading.
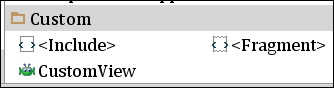
When you click CustomView, it will ask you to confirm which view class to use. Your CatView should be the only choice.
Below is a demo of the CatView in action.