Milestone 3
due Sunday 3 March at midnight
This milestone should be completed individually — I expect a commit from everyone. You may base your work on the requirements document by your own group, or any other group.
Your goal in this milestone is to build the preferences screen of your game app. Your screen should have at three different controls, and their settings should persist across leaving and restarting the app. You can implement this screen directly within the “hello world” app you already created. The steps are outlined below.
Respond to a button
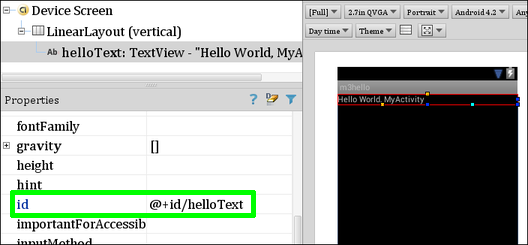
In your “hello world” project, open the MyActivity class (in the src folder) as well as res/layout/main.xml. In the layout file, select the “Hello World” message. You have to give it an id property of the form @+id/NAME where NAME can be whatever you want. I used helloText.
Save that and switch to the MyActivity class. We’re going to obtain a handle to that text view so we can modify the text as the app is running. First, declare an instance variable inside the class, but outside of any method:
TextView helloText;IntelliJ should offer to import android.widget.TextView. Then, inside the onCreate method, add this line after setContentView:
helloText = (TextView) findViewById(R.id.helloText);Finally let’s add a new method to the class. When called, it will update the text in the view. IntelliJ should offer to import android.view.View as you type this.
    public void clickMe(View v) {
        helloText.setText("Thanks for clicking!");
    }
Save that file and switch back to the layout. Now it is time to “wire up” a button to the clickMe method. From the Widgets section on the right, drag the Button onto the canvas. Depending on where you drag it, you can automatically select to have it left-aligned, right-aligned, centered, or fill the parent horizontally.

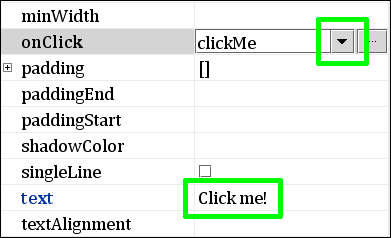
In the properties section, change the text of the button (I wrote “Click me!”) and use the drop-down for the onClick property to select the clickMe method you just added to MyActivity.
Save everything and run it in the emulator. When you push the button, the text view should respond.
Create a preferences activity
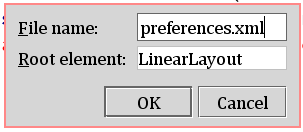
In the Project explorer on the left, right-click on the layout folder (within res) and select New » Layout Resource File. Name your file preferences.xml and hit OK.
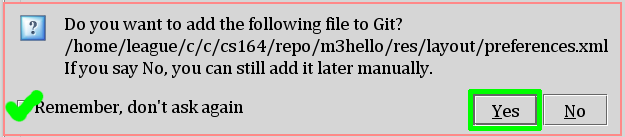
Whenever you create a new file, IntelliJ may ask whether to add it to git. Always say yes. Remember it if you don’t want to be bothered with this again.
In this layout, we will add controls corresponding to your app preferences (settings). Let’s start by adding a single check-box to control background music. Set the id and text properties.
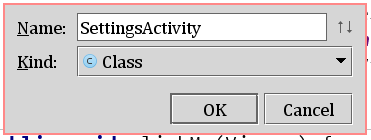
Now we’ll create the corresponding Java class. In the Project explorer on the left, right-click on the package in the src/ folder (probably called com.example.something) and select New » Java Class. Name your new class SettingsActivity and hit OK.
IntelliJ gives you an empty class. Make it extend Activity and override the onCreate method, as follows:
import android.app.Activity;
import android.os.Bundle;
public class SettingsActivity extends Activity {
@Override
protected void onCreate(Bundle savedInstanceState) {
super.onCreate(savedInstanceState);
setContentView(R.layout.preferences);
}
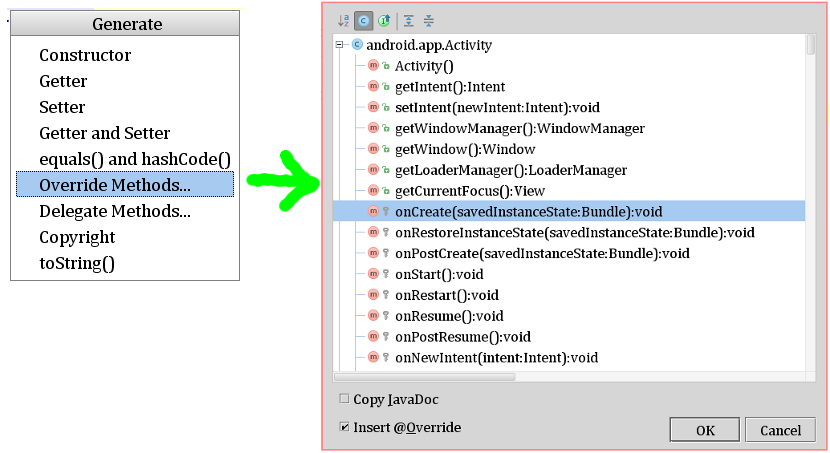
}In the future, you can use Code » Generate » Override Methods… to stub out the appropriate code for methods like onCreate. You’ll still have to add the call to setContentView.
Now you’ve got an Activity corresponding to the preferences screen, but it won’t open by default when you run the program. We need to ask Android to open it using an Intent. The first step is to declare the activity in the AndroidManifest.xml. Open that from the project explorer and look for the existing <activity>…</activity> declaration:
        <activity android:name="MyActivity"
                  android:label="@string/app_name">
            <intent-filter>
                <action android:name="android.intent.action.MAIN"/>
                <category android:name="android.intent.category.LAUNCHER"/>
            </intent-filter>
        </activity>
Right below that, add a new one:
        <activity android:name="SettingsActivity"
                  android:label="Preferences">
        </activity>
Save it and switch back to the main MyActivity class. When the user presses the button, we want to cause a switch to the Preferences screen. Add these two lines to the clickMe method:
        Intent intent = new Intent(this, SettingsActivity.class);
        startActivity(intent);
Now when you run the program, pressing the “Click me!” button should bring up the preferences screen. You can use the back button on the emulator interface to return to the main screen.
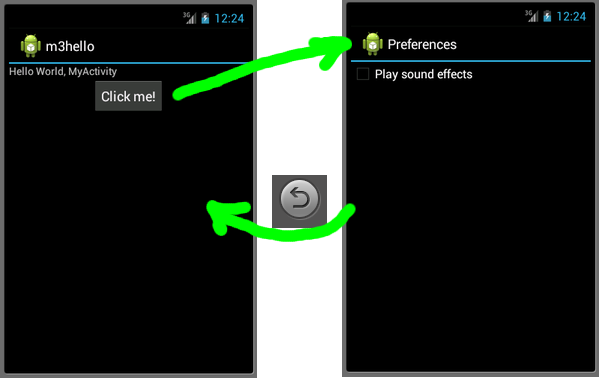
As you flip back and forth, notice that changes made on the preferences screen do not persist. If I turn on sound effects, when I return to the preferences, they are off again. Fixing that will be the next step.
You should also add whatever additional controls and labels you want on your app’s preferences screen.
Save the preferences
You should read elsewhere about the life-cycle of an activity in Android. Overriding methods such as onPause, onStop, and onDestroy give us an opportunity to save settings as the user leaves our activity, whether by using the back button, home button, or due to an incoming phone call.

So, we’re going to save the preferences in onPause and restore the preferences in onCreate. You may also want to do some logging from these methods to see when these things happen. You can read more about logging here.
Override onPause in SettingsActivity using Code » Generate » Override Methods, as described above. That will generate this:
@Override
protected void onPause() {
super.onPause();
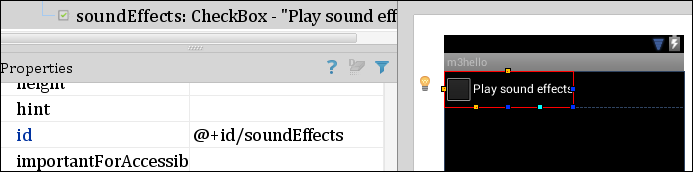
}After calling super.onPause, you will want to grab the values of any of your preferences controls and then save them to a file. First, we need handles to those controls. We could use findViewById directly here, but since we’ll also need to access them in onCreate, let’s use an instance variable. This is exactly the same as the way we saved the TextView helloText in MyActivity, except my sound effects preference is a CheckBox instead of a TextView. Here’s the instance variable — remember, it should be declared within the class, but outside of any method.
CheckBox soundEffects;While you’re out there, let’s also define a static instance variable for the name of our preferences file. Just name this after your application or project name.
static final String prefsName = "m3hello";Back in onCreate, you’ll grab the checkbox using findViewById, and then restore its value from the preferences file:
        soundEffects = (CheckBox) findViewById(R.id.soundEffects);
        SharedPreferences pref = getSharedPreferences(prefsName, Context.MODE_PRIVATE);
        soundEffects.setChecked(pref.getBoolean("soundEffects", true));
The second parameter to pref.getBoolean is true — this is used as the default value of the preference if the preferences file does not exist yet. Finally, in onPause, you can save the preference value:
        SharedPreferences pref = getSharedPreferences(prefsName, Context.MODE_PRIVATE);
        SharedPreferences.Editor edit = pref.edit();
        edit.putBoolean("soundEffects", soundEffects.isChecked());
        edit.commit();
If that all worked, then as you make the round-trip between your main MyActivity and the SettingsActivity, the Boolean value of the sound effects control will be saved.
The SharedPreferences facility has methods for saving string values, booleans, integers, floats, etc. Apply the same technique to the rest of your preference controls. There is more documentation about the shared preferences facility on the Android Developer site.