Milestone 2
due Sunday 17 February at midnight
Requirements spec.
For milestone 2, I would like you to continue working within your requirements groups to flesh out the ideas for your game apps. Show sample screens, document the flow between different sections, spell out the rules, etc. Post your results to your group’s discussion thread in the Requirements forum on Blackboard.
In addition to that, continue preparing your computer for Android development by following the remaining instructions.
Checkout from git (clone)
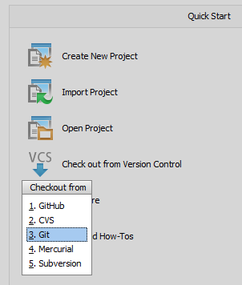
The first step is to open the IntelliJ IDEA application. From the initial quick-start screen, select Checkout from Version Control » Git.
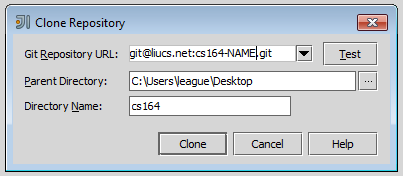
You’ll see a dialog to clone a repository.
Your repository URL should be
git@liucs.net:cs164-NAME.gitwhere you replaceNAMEwith the ID that I sent to you by reply email. It is usually your (possibly abbreviated) last name, followed by first initial.The parent directory controls where the folder for all your coursework will live. This is up to you, but you probably want it somewhere easily accessible, such as in
DocumentsorDesktop.The directory name is the folder the system will create (within the parent directory named above) to store your coursework. Thus I suggest
cs164or similar.
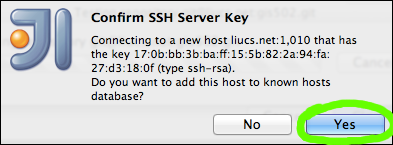
Before cloning the repository to your system, you may want to hit the test button. This will verify that your SSH connection to my git server works. It may first ask you to confirm the SSH server key. The key should start with 17:0b:bb:3b:ba.
Then, it will attempt to connect and – with any luck – report success. If it doesn’t, get in touch with me right away with any error messages you see. (Some of the screens below show gis502 where you should expect to see cs164.)

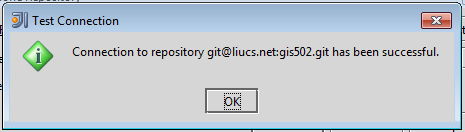
Successful git connection
Assuming the connection was successful, you can hit the ‘Clone’ button. IntelliJ may then ask if it should create a project – just say no. (For some reason, it may ask this question twice.)

Note: You should only need to clone the repository once. That new cs164 folder will stay there on your machine, and next time you create a project, you can start with the next section.
Create Android project
Back at the IntelliJ quick start menu, select “Create New Project.”
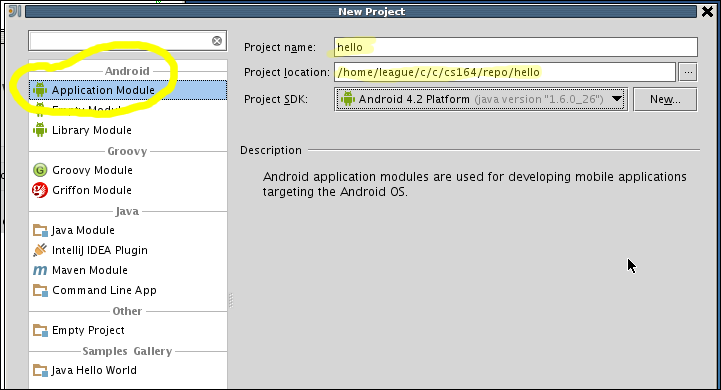
In the New Project dialog, select Android » Application Module on the left. The project name should be “hello” or something similar. Set the location to somewhere underneath the cs164 folder you checked out in the last section: \Users\MYNAME\Desktop\cs164\hello would be good. The Platform SDK should already be filled in with the latest Android Platform you configured.
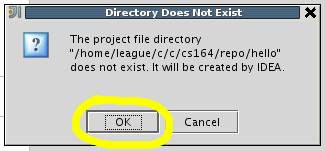
When you move on to the next step, IntelliJ will probably announce that it has to create the new folder. That’s good, hit OK.
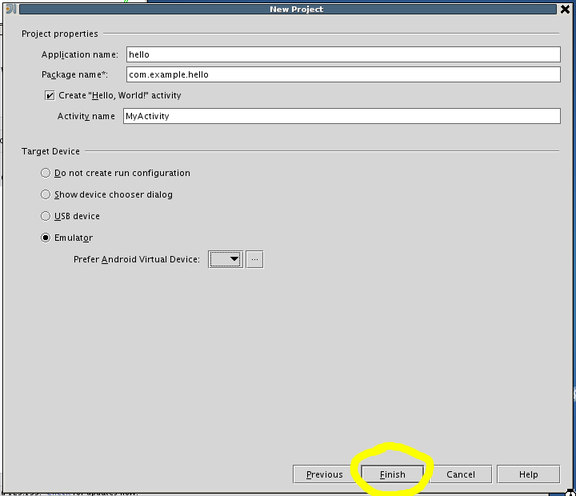
Accept all the defaults on the final step of the New Project dialog.
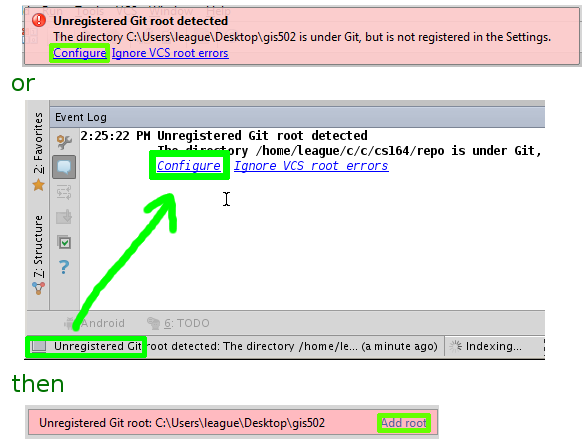
As IntelliJ creates and opens your project, you may see a warning bubble about “Unregistered Git Root.” Hit the ‘Configure’ link and in the dialog that pops up, click ‘Add Root’ and OK. If that warning bubble disappears too fast, you can find it again in the event log, usually in the bottom left.
Once the project is open, you should see a project explorer on the left side. We’re going to open two different files within that:
src/com.example.hello/MyActivity, andres/layout/main.xml.
The screens you’ll see for each file are pretty different:
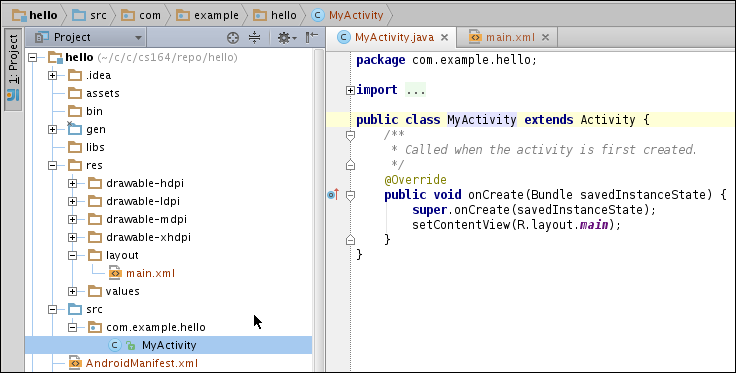
Viewing MyActivity.java
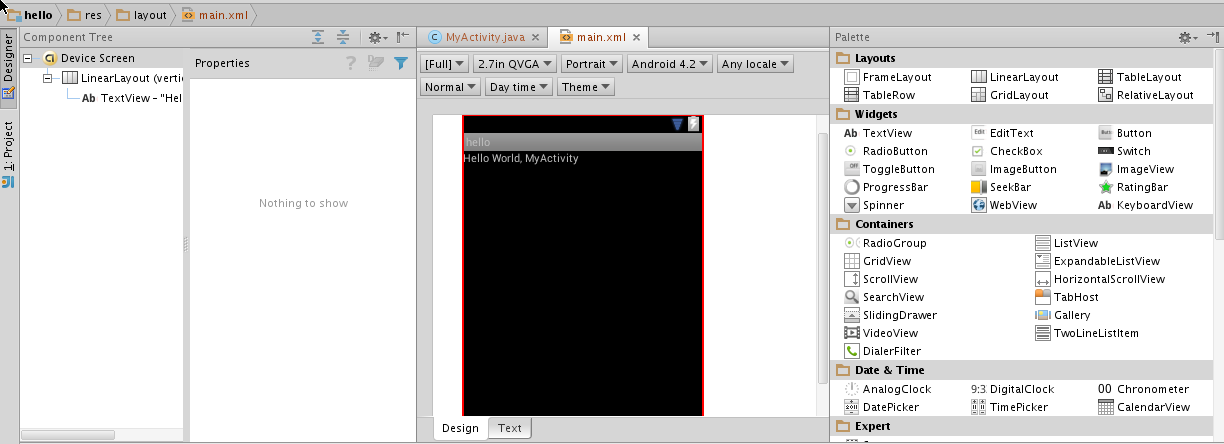
Viewing layout main.xml
Run your Android app
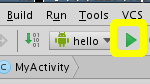
Now we will try to run this simple Hello-World app in the Android emulator. Click the green play button next to the Android run-configuration drop-down, or select Run » Run ‘Hello’ from the menu, or use the keyboard shortcut Shift-F10.
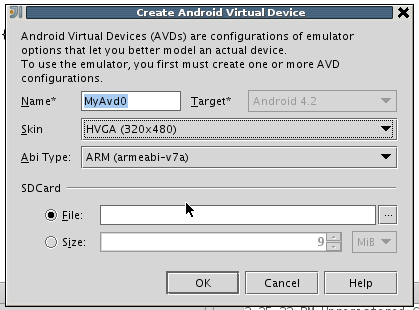
Before the app runs, IntelliJ will offer to create a new Android Virtual Device (AVD). Select a skin (device size), and hit OK.
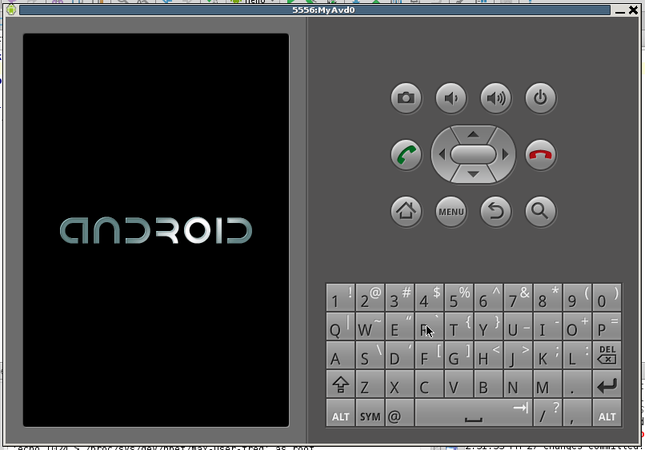
The emulator will start up. It will stay on this splash screen for a really really long time as it boots up. Just be patient. Eventually you’ll learn not to close the emulator because it takes so long to start each time. Fortunately, IntelliJ is capable of re-installing and re-running your app in the virtual device without rebooting it.
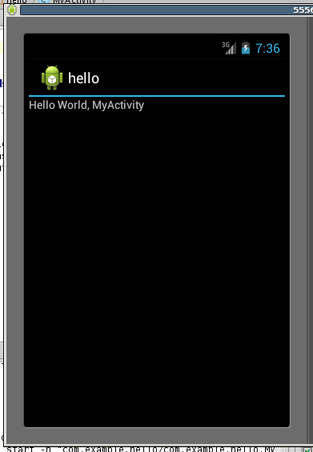
Once the Android device has booted, IntelliJ will install your app, and you’ll see the screen appear with the text “Hello World, MyActivity.”
Remember: do not close the emulator. Just switch back to IntelliJ when you want to make changes.
Edit your Android app
Now we’ll make a tiny change to the Android app, and run it again. Open the res/layout/main.xml file, or select that tab if you opened it already.
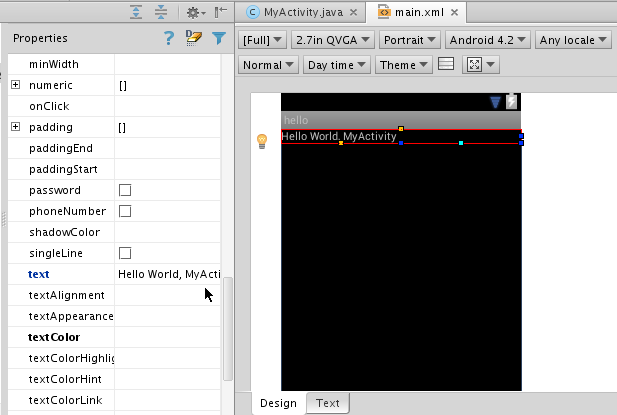
When you select the “Hello World” text in the screen layout, you’ll see a variety of properties to the left. Scroll down to find ‘text’, which contains the string displayed on the screen. Click that string to make changes. (You can also just double-click the Hello World text to change it.)
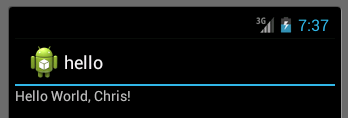
Replace “MyActivity” with your name. Then save (Ctrl-S or ⌘-S) and re-run. The modified message should open in the emulator before long.
Commit to git
Finally, in this section, you’ll learn how to save your work to your Git repository, and then upload it to my server. This is how you will submit project code for me to examine or, later, for your class-mates to try.
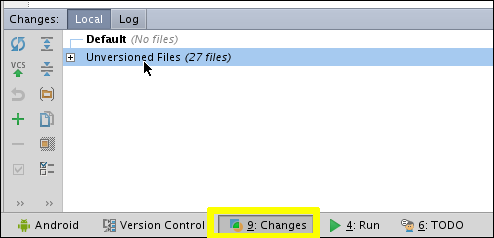
Click the “Changes” tab along the bottom status bar of IntelliJ.
If there are any Unversioned Files shown, you’ll have to right-click on them and select “Add to VCS.” After that, all the files should be grouped into one section called ‘Default’.
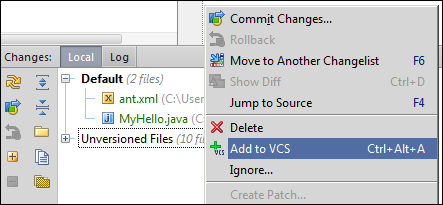
Right-click on Default and select “Commit Changes” (or find the corresponding tool-bar button to the left, or use the keyboard shortcut: Ctrl-K or ⌘-K). This will bring up the Commit dialog.
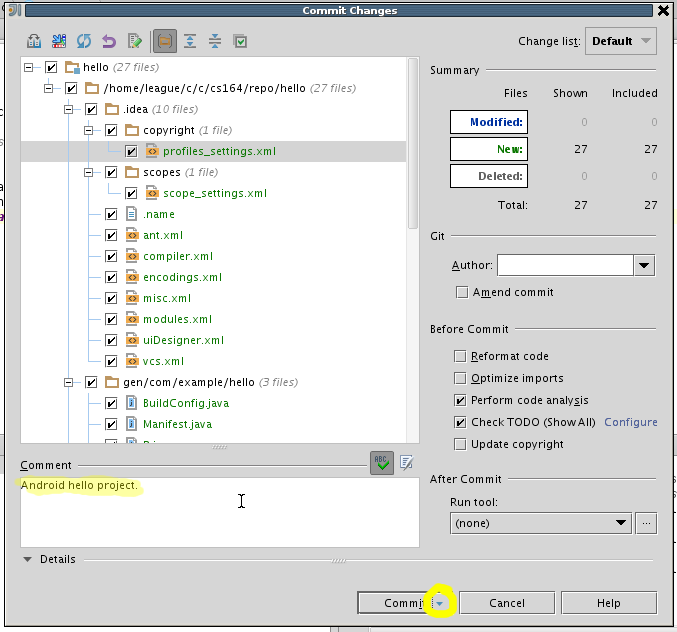
Add a comment to go along with your commit (it will be saved on the server along with your changes). Then, select the Commit-button drop-down and “Commit and Push.” (If you just Commit now, you can always push later by selecting VCS » Git » Push from the menu.)
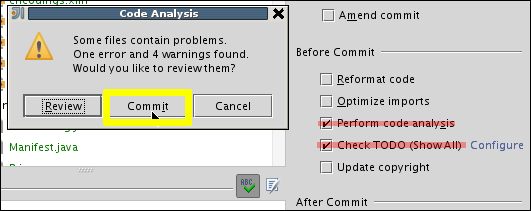
Before committing, IntelliJ may bother you about possible warnings or errors in the files… you usually just want to continue and commit. Clearing the checkboxes in that “Before Commit” section may help with this in the future.
Next, you’ll see the push screen. The defaults here are fine, so just confirm the Push button.
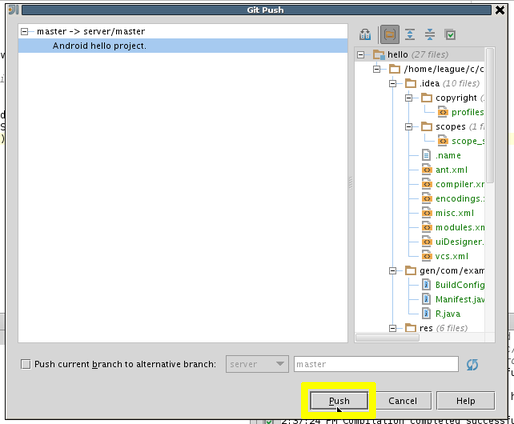
You might have to re-confirm the host key (17:0b:bb:3b:ba…), but it should remember from last time.

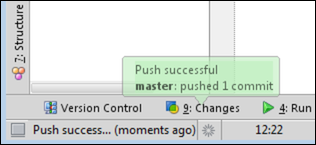
When all is done, you’ll get a success bubble, and you should also receive an email message from my server indicating a successful push. If something goes wrong, get in touch with me right away with the details.
That’s it, you are ready to continue with Android development on your machine, and submitting code to my Git server!
Now you may want to continue by playing with the layouts and drawing on the Canvas. I’d also suggest working through the Android Getting Started tutorials, especially: