JUnit Testing
In class on 3/18, we looked at the JUnit testing framework. I used the example of an Equation class, necessary for modeling the equation being built in the arithmetic game. Here is a basic (non-working) skeleton of Equation, and the methods that we need, along with a main method that does some preliminary tests.
public class Equation {
int theNumber;
char theOperator = ' ';
public void appendNumber(int x) {
theNumber = x;
}
public void appendOperator(char op) {
theOperator = op;
}
public void backspace() {
}
public void clear() {
}
public double evaluate() {
return 0.0;
}
@Override
public String toString() {
if(theOperator == ' ') {
return Integer.toString(theNumber);
}
else {
return Integer.toString(theNumber) + theOperator;
}
}
public static void main(String[] args) {
Equation eq = new Equation();
eq.appendNumber(3);
eq.appendOperator('+');
eq.appendNumber(4);
String str = eq.toString();
double result = eq.evaluate();
System.out.println(str); // calls toString
System.out.println(result);
// Check for the right answers
if(!str.equals("3+4")) {
System.out.println("FAIL: toString");
}
if(result != 7) {
System.out.println("FAIL: evaluate");
}
}
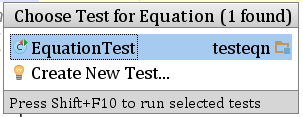
}From this class in IntelliJ, we can use Ctrl-Shift-T (Navigate » Test on the menu) to create a new test-case class, or navigate to the corresponding test case if it already exists.
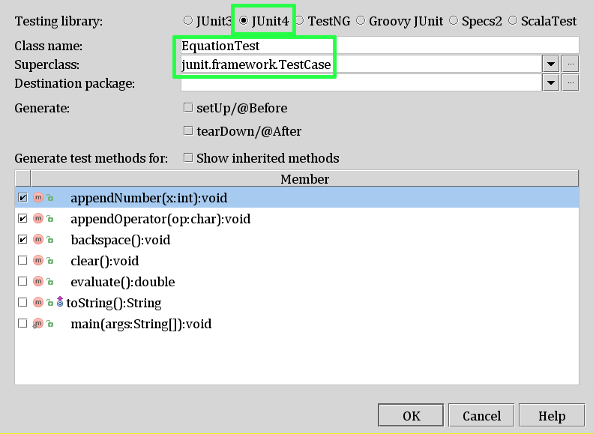
When you create a new test, you should select the “Junit 4” library. There may be a warning right below that indicating that your project is not configured for that library; just hit the “Fix” button. You should set the Superclass to junit.framework.TestCase (available in the drop-down). Then, select whichever method stubs you want to generate. Since Equation has a method backspace, it can generate a method in EquationTest called testBackspace.
Below is the EquationTest class that we worked with in class.
import junit.framework.TestCase;
import org.junit.Test;

public class EquationTest extends TestCase {
    @Test
    public void testAppend1Number() throws Exception {
        Equation eq = new Equation();
        eq.appendNumber(4);
        assertEquals("4", eq.toString());
    }

    @Test
    public void testAppendNumberAndOp() throws Exception {
        Equation eq = new Equation();
        eq.appendNumber(3);
        eq.appendOperator('+');
        assertEquals("3+", eq.toString());
    }

    @Test
    public void testOneFullOperation() throws Exception {
        Equation eq = new Equation();
        eq.appendNumber(3);
        eq.appendOperator('+');
        eq.appendNumber(4);
        assertEquals("3+4", eq.toString());
        assertEquals(7, eq.evaluate());
    }


    @Test
    public void testAppendOperator() throws Exception {
    }

    @Test
    public void testBackspace() throws Exception {

    }

    @Test
    public void testClear() throws Exception {

    }

    @Test
    public void testEvaluate() throws Exception {

    }

    @Test
    public void testToString() throws Exception {

    }
}
To run the tests, you’ll need a new “Run Configuration”. Select Run » Edit Configurations from the menu. Use the plus sign in the upper left to add a JUnit configuration, and set the parameters as shown below.
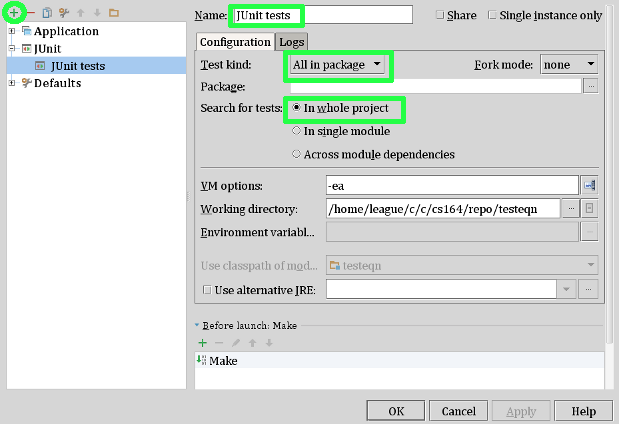
Now, your JUnit configuration should be available in the drop-down next to the run button.

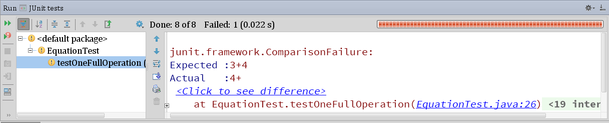
When you run the JUnit tests, you’ll see the results at the bottom, with that long bar in the upper right: red for failure, green for success.